The Top Smoke Spots on the Valorant Map Pearl

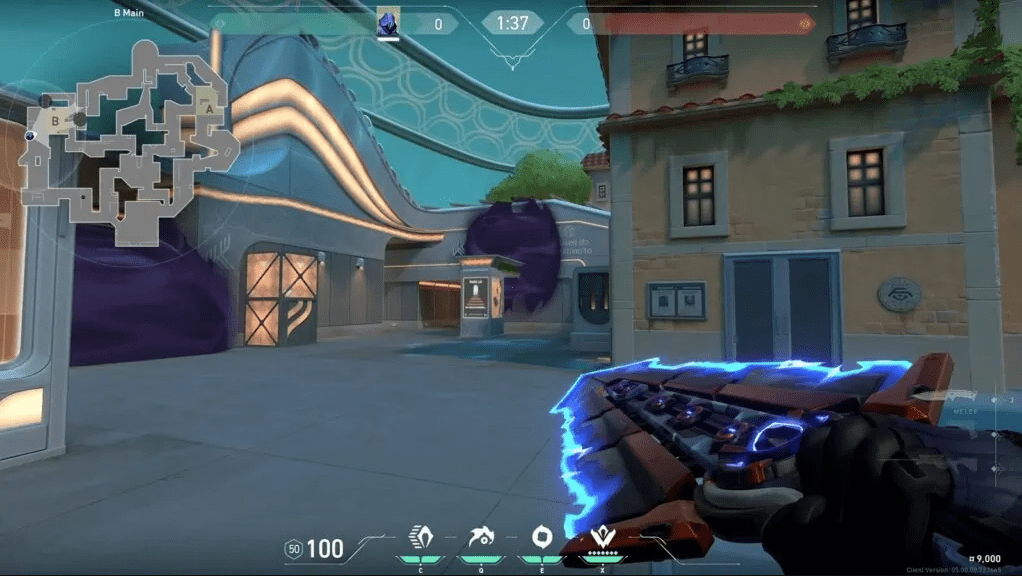
Prepare to dive into the depths of Valorant’s breathtaking eighth map, Pearl. This submerged cityscape presents a unique battleground, boasting a myriad of tight corners, winding pathways, and a sprawling Mid area that beckons players to explore its strategic possibilities. Navigating this underwater metropolis requires not only sharp reflexes but also a keen understanding of smoke placement. By strategically obstructing enemy lines of sight, you can apply pressure, create advantageous opportunities, and secure victory for your team.
Whether you’re a master of shadows like Omen, a celestial tactician like Astra, or a fiery commander like Brimstone, mastering the art of smoke deployment on Pearl is essential. So, venture forth, discover the optimal smoke spots, and make your mark in this watery battlefield.
Table of Contents
Essential Smoke Placements on Pearl: Your Guide to Mastering the Map
A Site push
When coordinating a five-man push from A Main on the Pearl map, it’s crucial to have a solid smoke strategy in place. By effectively blocking off the top of the stairs in A Link, you can disrupt the enemy team’s ability to establish a cross-fire position, giving your team a significant advantage. Depending on the number of smokes remaining, you have the flexibility to choose between blocking off A Flowers or A Secret.
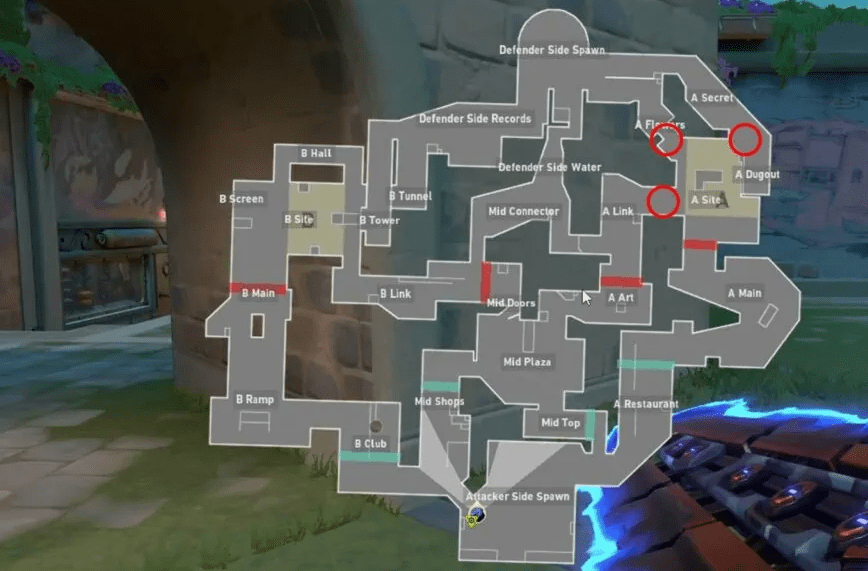
These well-placed smokes will not only make it easier for your team to breach the A Site but also obscure the most commonly held vantage points by the defending team. By denying them clear sightlines, you create confusion and limit their ability to effectively defend the site.
Furthermore, when executing an A Site split push from both A Main and A Art through Mid Plaza, utilizing smokes to cover A Flowers and A Secret can provide a seamless path for your team to infiltrate the site. This coordinated approach ensures that your team can overwhelm the defenders and secure control of the objective.
Remember, mastering the art of smoke placement on Pearl is essential for executing successful strategies and gaining the upper hand in engagements. So, study the map, experiment with different smoke positions, and refine your tactics to dominate the Pearl map in Valorant.
Mid push
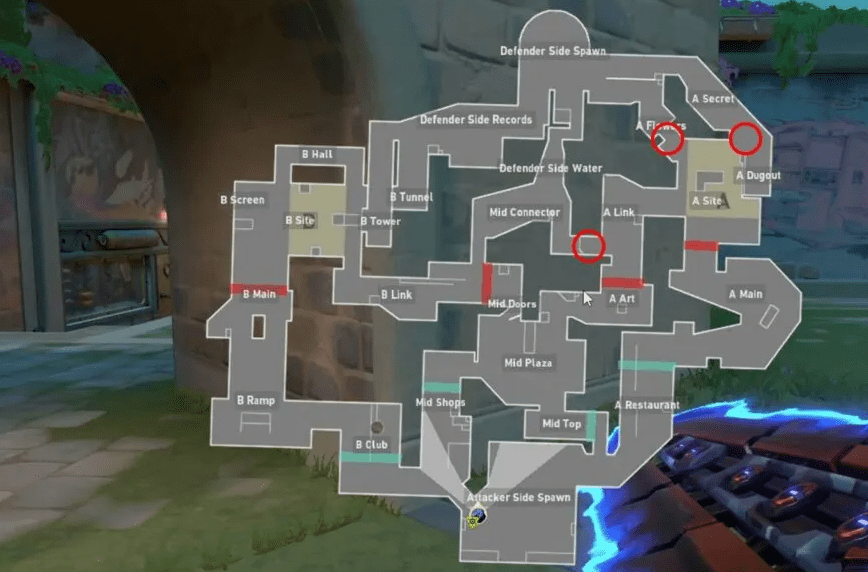
The central region boasts an abundance of narrow passages that can be strategically exploited by attackers. When orchestrating a Mid to A Site push, the journey commences from Mid Plaza. Once Mid control is established, the path leads towards A Art. By skillfully deploying a smoke grenade at Mid Connector, defenders’ ability to hold close angles is effectively neutralized, greatly facilitating the conquest of A Link. With A Link secured, controllers can proceed to strategically smoke A Flowers or A Secret before making their decisive move into the A Site. However, it is crucial to remain vigilant and anticipate opponents who might attempt to exploit the cover provided by the smoke at Mid Connector.
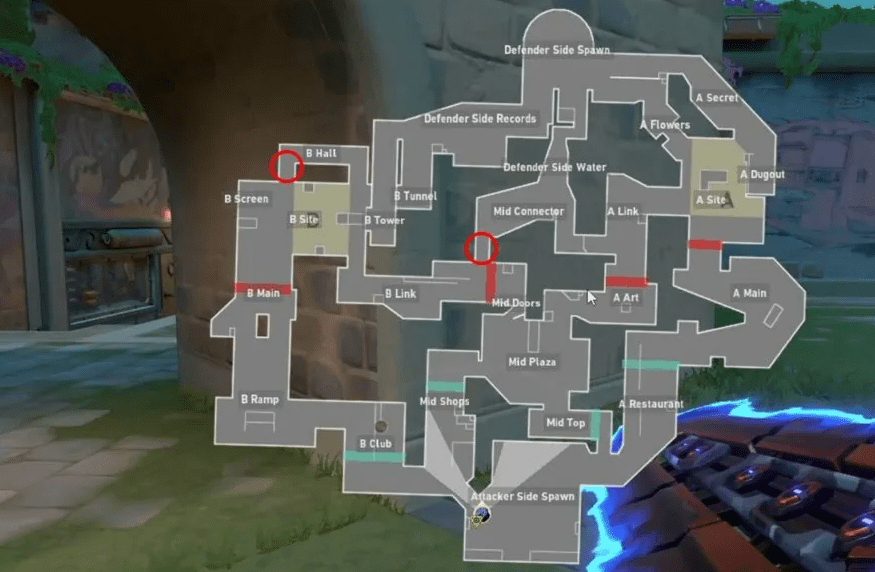
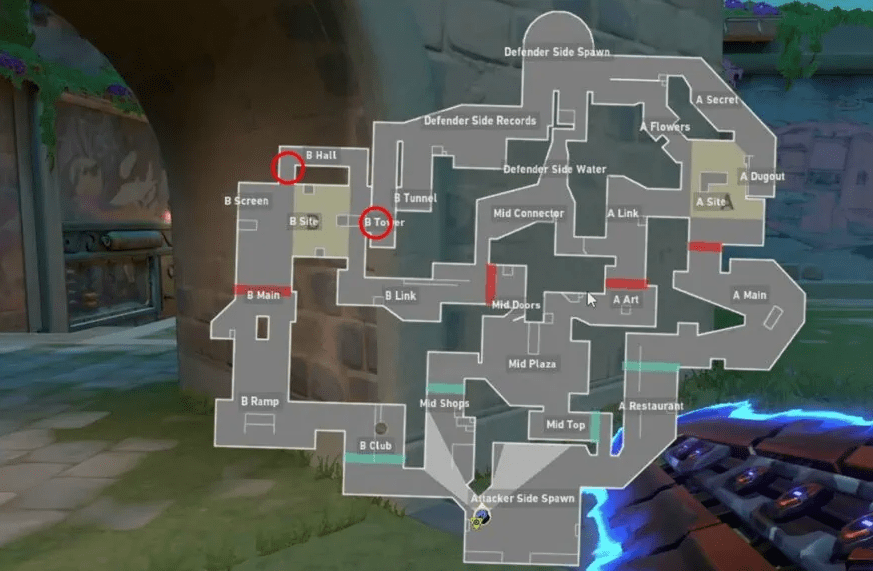
Alternatively, if your objective is to dominate the B site, the preferred route involves traversing through Mid Plaza and subsequently assuming control of Mid Doors. Venturing down B Link presents its own set of challenges, as defenders positioned at Mid Connector pose a significant threat. However, by skillfully deploying a smoke grenade to block off this area, you effectively nullify their ability to impede your progress while crossing over to B Link. Once successfully advanced to B Link, it is prudent to tactically employ smoke grenades to obscure either B Hall or B Tower, providing crucial cover before infiltrating the site. It is worth noting that B Hall presents two distinct openings, necessitating a judicious selection based on the prevailing circumstances and available resources.
READ MORE
- The best Valorant Sunset smokes to block off lines of sight
- How to use Gekko’s Wingman to plant and defuse the spike in Valorant
- The best Icebox smokes: Attack and defense setups
B Site push
When it comes to executing a successful strategy in the game, understanding the dynamics of different areas and utilizing strategic smokes can play a pivotal role. Let’s explore the intricacies of the Mid section and the B site in more detail.
The Mid section presents a multitude of narrow passages, offering both opportunities and challenges for attackers. These narrow passages can be exploited by attackers to gain an advantage over defenders. To initiate a push from Mid to the A Site, the key starting point is Mid Plaza. By securing control over Mid, you create a pathway towards A Art. To facilitate a smoother transition into A Link, it is advisable to deploy a smoke at Mid Connector.
This smoke not only blocks off close angles that defenders may be holding but also provides cover for your team as you make your way towards A Link. Once A Link is secured, controllers can further enhance the push by utilizing smoke grenades on A Flowers or A Secret before entering the A Site. However, it is important to remain vigilant as opponents may attempt to push through the smoke at Mid Connector, catching you off guard.
On the other hand, if your focus is on conquering the B site, the approach requires navigating through Mid Plaza and asserting control over Mid Doors. The path from Mid Plaza to the B site can be challenging, as defenders positioned at Mid Connector can pose a significant threat. However, by strategically deploying a smoke grenade to block off the Mid Connector, you can restrict defenders’ line of sight and create a safer passage for your team. Once you successfully make your way through B Link, it is essential to employ smoke grenades to cover either B Hall or B Tower before entering the site. Careful consideration should be given to the choice of smoke placement, as B Hall offers two openings that need to be taken into account.
In both scenarios, the effective use of smokes can significantly improve your team’s chances of success. By understanding the layout of the map and utilizing strategic smokes at the right locations, you can create opportunities, disrupt defenders’ positions, and increase your team’s chances of securing the objective. Communication and coordination among team members are crucial in executing these strategies effectively.
Remember, every round presents a unique set of challenges and opportunities. It is important to adapt your approach based on the evolving dynamics of the game, the actions of your opponents, and the strengths and weaknesses of your team. With practice, experience, and a strategic mindset, you can elevate your gameplay and achieve victory in the competitive world of the game.
Defenders
A site defense
When you detect any signs of movement or activity at A Main, it serves as an important cue to take defensive measures. One effective approach is to strategically block off the top of the stairs leading from A Main. By doing so, you create a barrier that impedes the attackers’ progress and limits their ability to gain further ground. This can disrupt their planned assault and buy valuable time for your team to regroup and prepare for a counterattack.

In addition, if the attackers manage to successfully secure control of A Link, it becomes even more crucial to adapt your defensive strategy. Deploying a well-placed smoke at the top of the stairs in A Link can be a game-changer. Not only does it obscure the attackers’ line of sight, but it also provides you and your team with enhanced cover and protection. This smoke can create a significant obstacle for the attackers, forcing them to reconsider their approach and potentially buying your team the precious moments needed to reposition, gather information, and mount a strong defensive response.
By employing these strategic smoke placements and reacting swiftly to potential threats, you can effectively disrupt the attackers’ plans and maintain a strong defensive stance. Remember, communication and coordination among your teammates are essential in ensuring that everyone is aware of the situation and can respond accordingly. Stay vigilant, adapt your strategies as needed, and work together to defend your territory successfully.
Mid defense
Having a strong hold on the Mid area is absolutely crucial in the Pearl map. It serves as a pivotal point that grants you significant advantages and opens up various strategic possibilities.
One of the key benefits of controlling Mid is the ability to execute seamless rotations between the different sites. This flexibility allows your team to swiftly respond to any threats or opportunities that arise during the round. By maintaining a solid grip on Mid, you can effectively cut off enemy rotations and catch attackers off guard as they attempt to navigate through the map.
Furthermore, Mid also provides a direct path into the defenders’ spawn area. This can be a game-changer, as it puts immense pressure on the attackers and disrupts their plans. By infiltrating the defenders’ spawn, you gain a strategic advantage that can destabilize the enemy team and create chaos in their ranks.
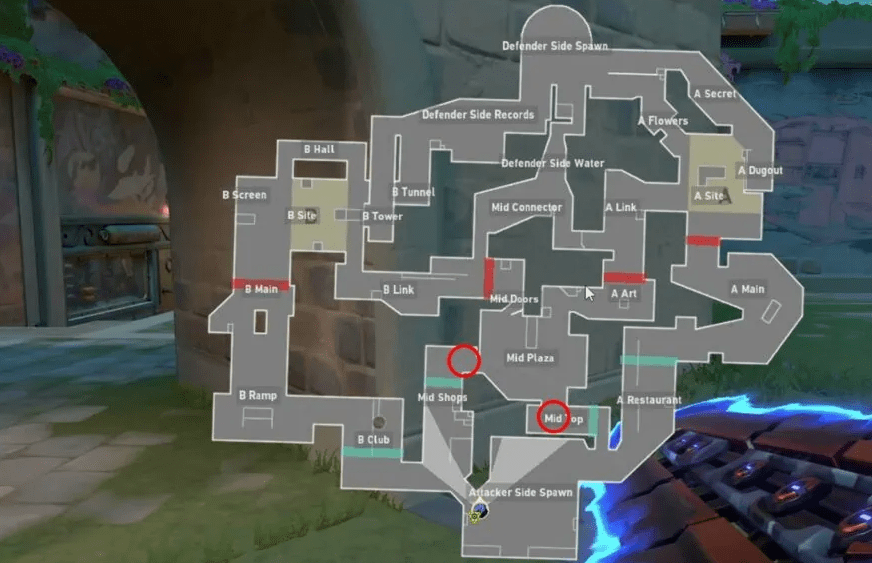
To deny attackers from taking control of Mid Plaza, defenders have an array of options at their disposal. One effective tactic is to block off key entry points such as Mid Shops or Mid Top right from the beginning of the round. This proactive approach forces attackers to divert their attention and resources, making it challenging for them to gain a foothold in Mid. It also buys valuable time for defenders to set up their positions, gather information, and devise a comprehensive defensive strategy.
However, it’s important to note that maintaining Mid control is an ongoing endeavor. It requires constant vigilance, map awareness, and adaptability. Communication among defenders is paramount as it allows for the timely exchange of information and coordination of defensive maneuvers.
In summary, securing Mid control in the Pearl map is a strategic imperative. It grants you the ability to rotate efficiently, disrupt enemy plans, and gain access to the defenders’ spawn. By implementing effective defensive measures and maintaining a coordinated effort, you can tilt the odds in your favor and achieve victory in this intense battleground.
B site defense
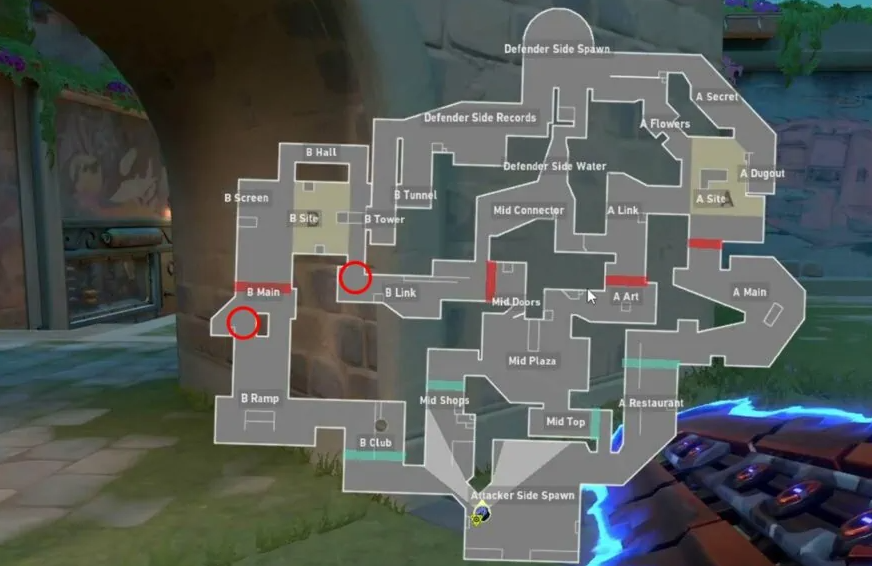
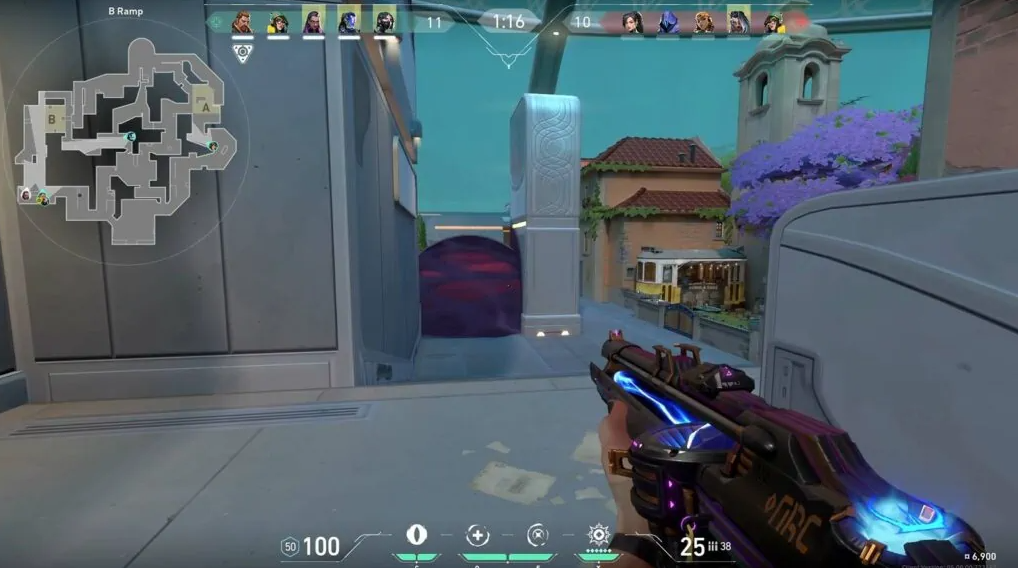
Defending the B site in Pearl can present some challenges for defenders. Due to the expansive nature of B Main, a single smoke may not provide sufficient coverage for the entire area. To address this, defenders can strategically utilize smokes to minimize the number of angles they need to monitor. By smoking one side of B Main, defenders can narrow down the attackers’ line of sight, creating a more focused defensive position. This forces the attackers to exercise caution, as defenders may potentially push up into the smoke or hold strategic positions within the confined space of B Main.
Additionally, if the defenders lose control of Mid, it becomes crucial to block off the entryway from B Link to the B Site. This tactical maneuver acts as a deterrent, impeding the attackers’ progress and making it more challenging for them to penetrate the B Site. By denying them easy access through B Link, defenders buy themselves valuable time to regroup, reinforce their defensive positions, and mount a stronger defense.
Successfully defending the B Site requires adaptability and effective teamwork among defenders. Clear communication regarding enemy movements and the strategic placement of smokes is essential for a cohesive defense. By employing strategic smoke placements and effectively blocking off entryways, defenders significantly enhance their chances of thwarting attackers’ advances and securing victory in the round.


