Best Smoke Locations for Valorant’s Lotus Map
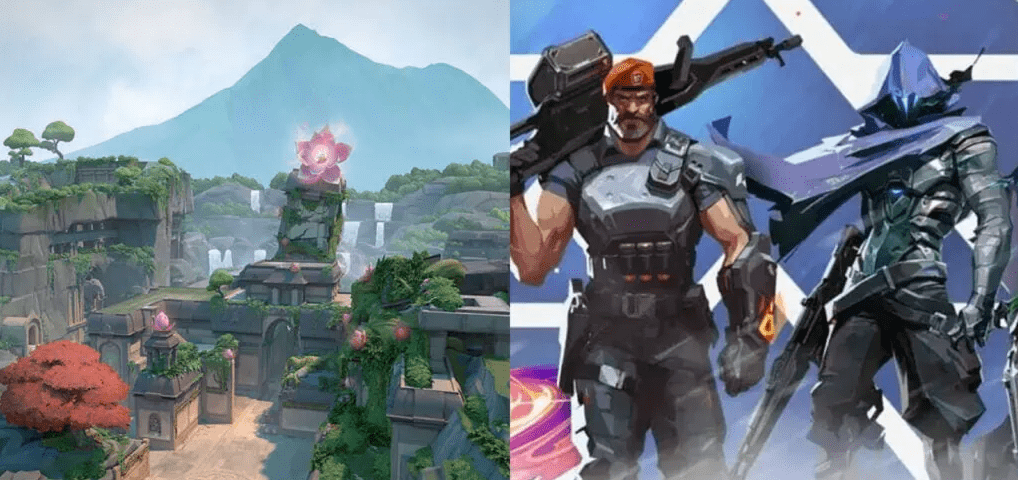
Lotus offers a truly immersive and captivating experience, boasting a complex layout that sets it apart from all the previous maps we’ve encountered so far in Valorant. This lost city is a sprawling expanse, teeming with mysterious wonders and filled with new and exciting gameplay elements that are sure to keep players on their toes. One such element is the introduction of rotating doors, adding an extra layer of strategic depth to engagements. These doors can be used to surprise opponents or create new paths of attack, providing a fresh and dynamic approach to gameplay.
Additionally, Lotus features a breakable wall that opens up an additional passage, allowing for tactical maneuvers and unexpected flanking opportunities. The ability to strategically breach this wall can catch opponents off guard and create chaos within their ranks. Furthermore, there is a unique silent drop mechanic in Lotus that adds a thrilling sense of suspense to matches. Players must be cautious and constantly aware of their surroundings, as a sudden descent from above can quickly change the tide of battle.
In the midst of these exciting new features, the role of controllers becomes pivotal. As a controller, it is essential to have a deep understanding of the map and know precisely where to deploy smokes. These strategic smoke placements can significantly impact the outcome of both offensive and defensive strategies. By obscuring your opponents’ vision in strategic areas, you can grant your team a crucial advantage, enabling them to seize control of the map and secure key positions.
Table of Contents
All the smokes you need to know on Lotus
Attackers
When you’re on the attack, it’s crucial to always keep an eye out for defenders who might push out from the sites they’re defending. The success of your smoke plays heavily relies on blocking the enemy team’s line of sight. Therefore, it’s essential to gather information about the enemy players’ positions before committing to smoke a particular area.
Understanding the defenders’ tendencies and potential aggressive pushes can greatly enhance your smoke strategy. By anticipating their movements and finding out where they might be lurking, you can make informed decisions on where to place your smokes. This not only maximizes the chances of blocking their vision but also minimizes the risk of wasting valuable utility.
One effective approach is to coordinate with your teammates and gather intel through communication. Share any observations or enemy positions that you or your teammates have spotted. This collaborative effort ensures that everyone is on the same page and can make better-informed decisions when it comes to deploying smokes.
Additionally, utilizing reconnaissance tools and abilities can provide you with valuable information about the enemy’s whereabouts. Agents with abilities like Cypher’s Spycam or Sova’s Recon Bolt can help reveal defender positions, giving you a tactical advantage in determining where to place your smokes effectively.
A site push
When embarking on a five-man push from A Lobby, it is of utmost importance to prioritize blocking off A Stairs before proceeding. By doing so, you create a vital barrier that allows your team to safely traverse from A Main to A Rubble, minimizing the risk of encountering defenders or falling victim to unexpected ambushes.
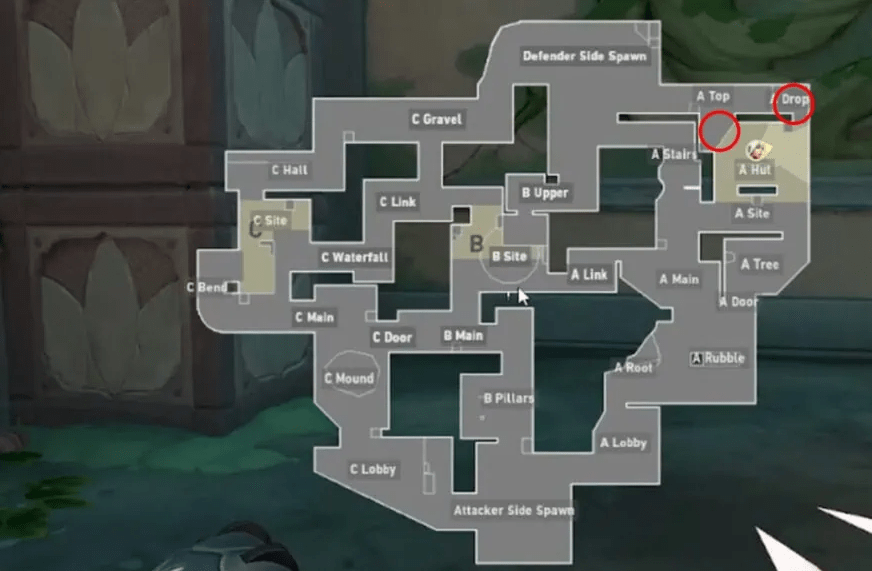
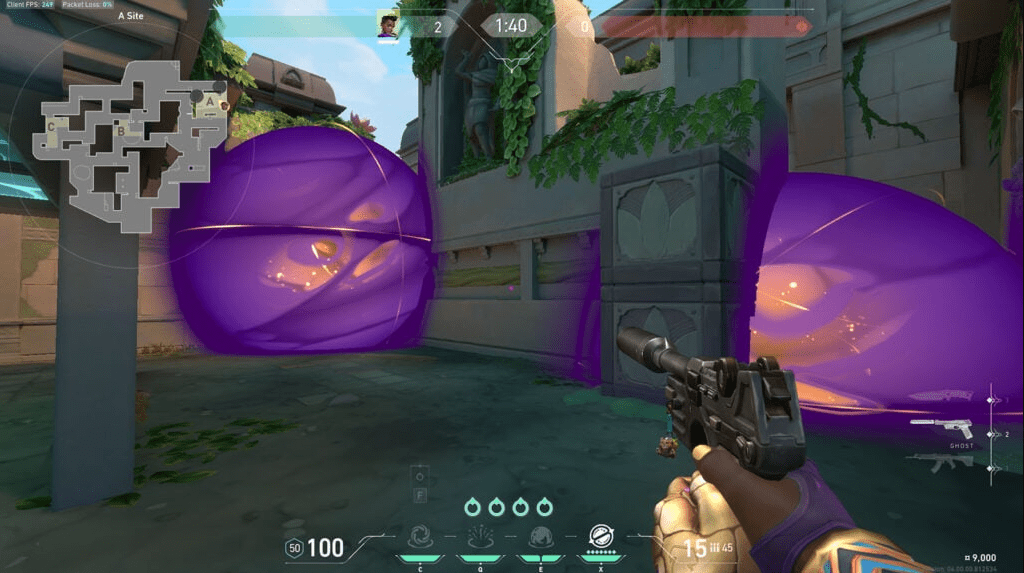
As your team prepares to breach the A site from A Main, it is crucial to employ strategic smoke placements and maintain a meticulous approach to clearing the site’s corners. By utilizing smoke grenades at A Top or A Drop, you effectively disrupt the defenders’ line of sight and create a shielded zone for your team to advance. Simultaneously, it is essential to methodically clear the corners of the site, ensuring that no lurking opponents catch your team off guard.
These well-placed smokes not only isolate defenders who may be holding positions within the A site but also serve as a deterrent to opponents who might attempt to rotate from the defender side spawn. By limiting their vision and denying them crucial information, you gain a significant advantage in the engagement.
However, it is important to remember that executing such maneuvers requires effective teamwork and coordination. Clear communication among team members is vital to ensure everyone is on the same page regarding smoke placements and corner clearing responsibilities. By working together seamlessly, your team can synchronize their efforts and create a formidable presence on the A site.
Furthermore, adaptability is key in such scenarios. The unpredictable nature of the game means that defenders may adjust their positions or strategies to counter your push. It is crucial to remain flexible and be prepared to adjust your smoke placements and clearing strategies accordingly. Staying one step ahead and anticipating the defenders’ movements will greatly contribute to the success of your assault on the A site.
In summary, when executing a five-man push from A Lobby, taking the time to block off A Stairs and strategically employ smokes at A Top or A Drop is essential. By combining these tactics with thorough corner clearing, you isolate defenders and disrupt opponent rotations, giving your team a significant advantage. Through effective communication, adaptability, and cohesive teamwork, you can maximize your chances of successfully securing the A site and achieving victory in Valorant.
B site push
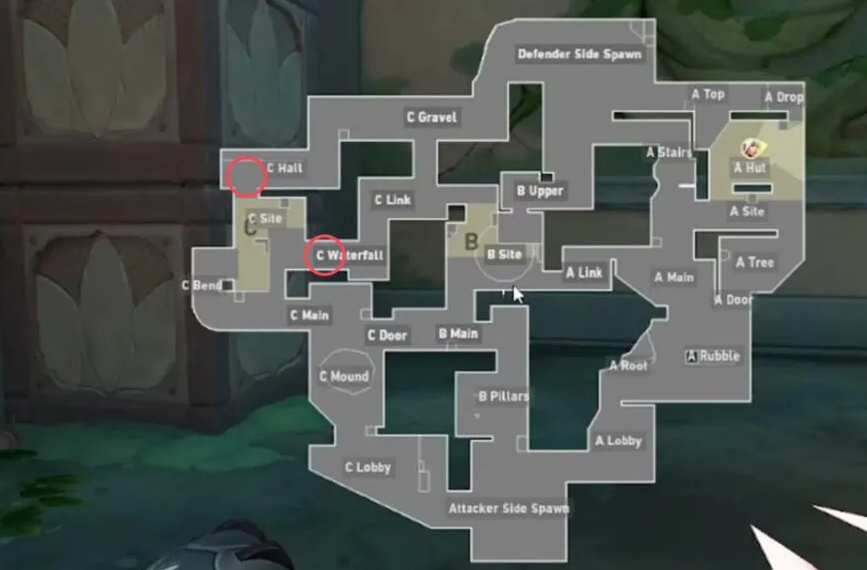
When defending the B site, it’s important to be aware of the three primary vantage points that defenders commonly utilize: the C Link doorway, B Upper, and A Link. Each of these positions offers unique advantages for defenders to control the site and impede the attackers’ progress.
However, if you happen to be playing as Astra or Omen, you face the limitation of only being able to activate two smoke abilities simultaneously. This restriction requires careful consideration and strategic decision-making when it comes to deploying your smokes effectively.
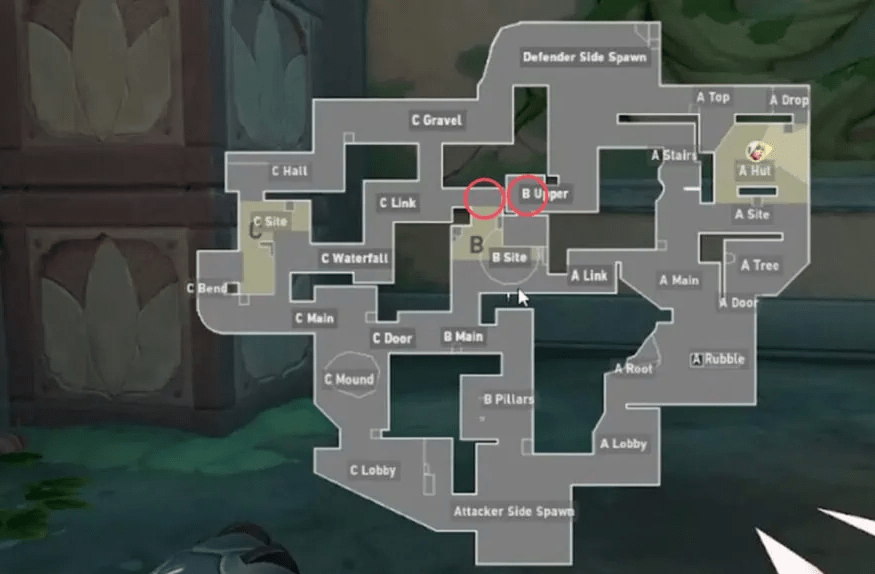
In order to optimize your defensive strategy and create favorable conditions for a successful post-plant situation, it is advisable to prioritize smoking off C Link and B Upper. By doing so, you create a barrier that hinders the attackers’ line of sight and limits their options for entry and movement. Blocking off C Link prevents attackers from pushing through that doorway and gaining access to the site, while obscuring B Upper restricts their ability to take advantageous positions and control the high ground.
By focusing on these two areas, you set yourself up for success in maintaining A Link control, which is crucial for a successful post-plant scenario. A Link serves as a critical pathway and potential flank route for attackers, so denying their vision and presence in that area significantly weakens their ability to mount a successful retake.
Additionally, by prioritizing these smoke placements, you create a more manageable defensive setup for yourself and your team. It allows you to concentrate your attention and resources on specific angles and chokepoints, increasing the likelihood of effectively holding off the attackers’ advances.
However, it’s important to note that strategy and adaptability are key in any defensive situation. The dynamic nature of the game means that attackers may attempt different approaches or adjust their strategies accordingly. As a defender, it’s crucial to remain flexible and be prepared to adapt your smoke placements based on the evolving circumstances and the actions of the attacking team.
In summary, when defending the B site as Astra or Omen, it’s crucial to prioritize smoking off C Link and B Upper to maintain control and create favorable conditions for a successful post-plant situation. By denying the attackers vision and restricting their movement in these areas, you increase your chances of successfully defending the site and thwarting their retake attempts. Remember to stay adaptable and adjust your strategy as needed to effectively counter the attackers’ tactics.
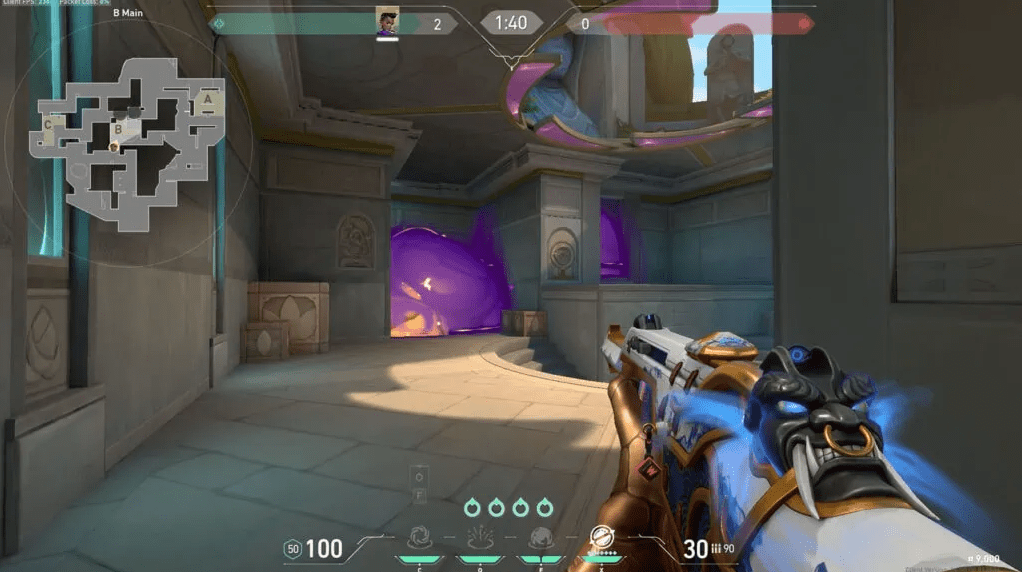
C site push
When executing a default push on the C site, it is imperative to strategically employ smoke grenades to obscure C Waterfall and C Hall. By effectively blocking off these areas, you create a barrier that isolates any defenders positioned inside the C site and hinders the rotations of their teammates from other parts of the map.
However, it is essential to acknowledge the intricacies of the C site, which is replete with numerous nooks and crannies that demand thorough examination. Before committing to the spike planting, it is paramount to ensure that the path to the site is clear of any lurking defenders. Taking the time to meticulously clear these hidden spots significantly reduces the risk of encountering unexpected resistance during the crucial spike planting phase.
Communication and coordination among team members play a pivotal role in this process. Sharing information about cleared areas and potential threats allows for a more synchronized and efficient execution of the push. Maintaining a unified front and conducting systematic checks will instill confidence in the team and mitigate the chances of falling victim to surprise attacks.
Moreover, it is important to adapt to the evolving dynamics of the round. Defenders might alter their positions or adopt different strategies to counter your push. Remaining flexible and ready to adjust your approach accordingly is key to overcoming these challenges. This could involve modifying smoke placements, altering the order of clearing corners, or even calling for backup from teammates to ensure a successful spike plant.
In summary, executing a default push on the C site necessitates the strategic utilization of smoke grenades to obstruct C Waterfall and C Hall. Thoroughly clearing the nooks and crannies of the site ensures a safe and successful spike planting process. Effective communication, coordination, and adaptability are crucial elements that contribute to a well-executed push and increase the chances of securing victory for your team.
Split pushes
When your team decides to execute a split push on both the A and B sites, employing strategic smoke grenades becomes crucial. One effective tactic is to obscure the C Link corridor leading towards the B site, which disrupts the defenders’ line of sight and limits their ability to gather information about your team’s movements.
Simultaneously, it is advisable to deploy smoke to cover the area in front of A Stairs. This creates a smokescreen that provides cover for your team’s approach from A Tree, making it harder for defenders to accurately gauge your positioning and intentions. By executing this dual-smoke strategy, you create a scenario where defenders on both sites and those positioned in B Upper are put under immense pressure from multiple angles.

The Lotus map presents numerous avenues and angles for both attackers and defenders to utilize. To gain an edge, it is essential to think creatively and exploit the map’s layout to your advantage. By finding unique smoke placements and forcing your opponents to constantly readjust their positions, you can create confusion and disarray within their ranks. This unpredictability increases the likelihood of catching them off guard, giving your team the upper hand.
However, it is vital to remain adaptable and responsive during the execution of a split push. Defenders may attempt to counter your strategy by adjusting their positions or deploying countermeasures, such as utility or rotations. To counteract these defensive maneuvers, it is important to maintain strong communication within your team and quickly adapt your approach based on the evolving situation. Flexibility and the ability to make on-the-fly decisions are key factors that can turn the tide in your favor.
In conclusion, executing a split push on the A and B sites requires a well-coordinated utilization of smoke grenades. By strategically obscuring the C Link corridor and A Stairs, you create confusion and pressure the defenders from multiple directions. Leveraging the intricacies of the Lotus map and maintaining adaptability are essential for achieving success in your split push strategy.
Defenders
Being the only controller player on your team can present a unique set of challenges when it comes to deploying smokes effectively. Without the support of other controllers, the timing and placement of your smokes become crucial factors that can significantly impact the outcome of a round.
One of the biggest hurdles you may face is the difficulty of positioning yourself near the area that the attackers are planning to push. As a controller, your primary role is to manipulate the battlefield with your smokes, creating advantageous situations for your team. However, if you are far away from the intended site of attack, it becomes challenging to execute this task efficiently.
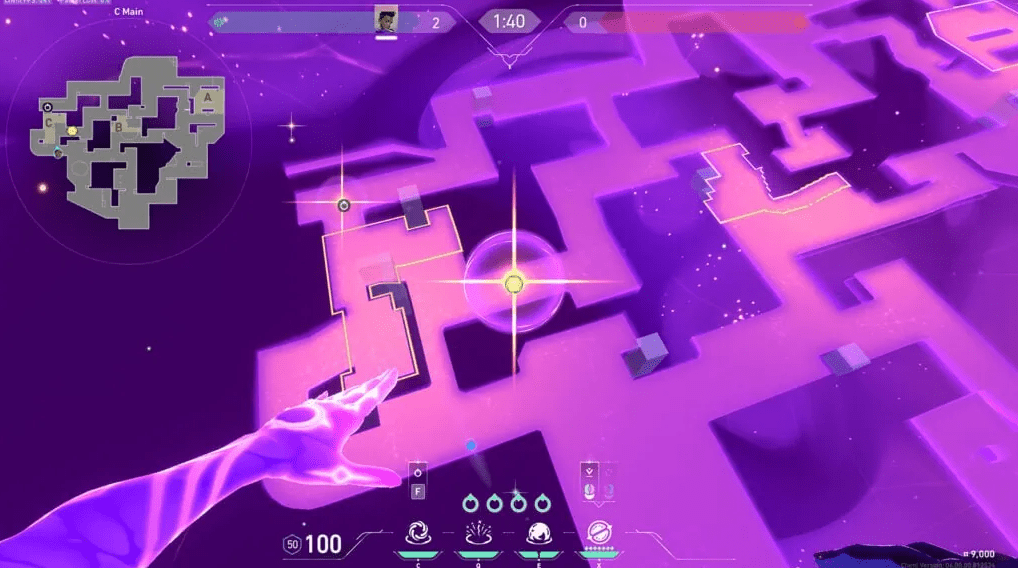
In such scenarios, playing as Astra can provide some advantages. Astra’s ability to place smokes at a distance, using her astral form, allows for greater flexibility in controlling the battlefield. This means that even if you are not physically present near the area being pushed, you can still contribute by strategically deploying smokes from a distance.
Communication and coordination with your teammates become paramount when you are the sole controller player. It is vital to stay in constant contact and gather information about the attackers’ plans and movements. This way, you can anticipate their push and position yourself accordingly to maximize the impact of your smokes.
Additionally, understanding the map dynamics and common attack patterns can give you an edge as a solo controller player. By predicting the likely paths the attackers will take, you can pre-emptively position yourself in a way that allows for effective smoke placements, even if you are not in close proximity to the action.
A site
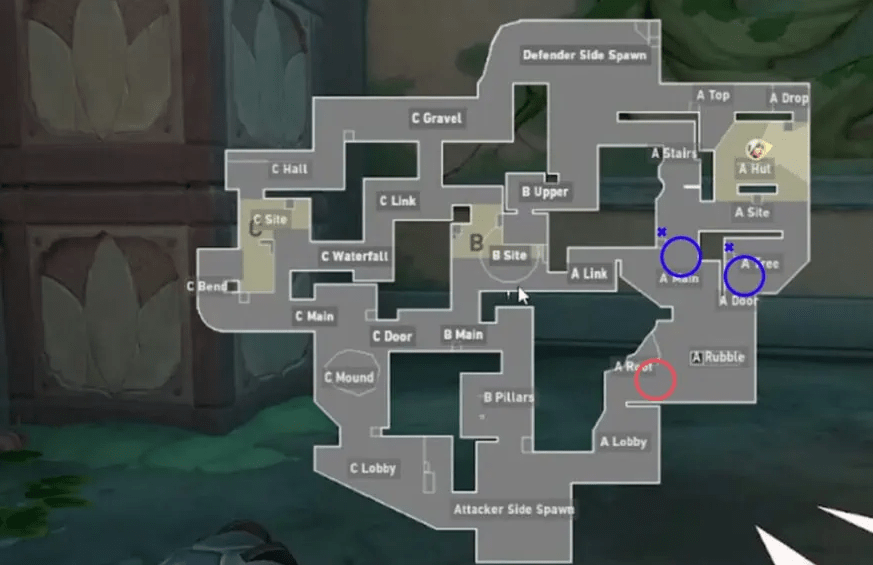
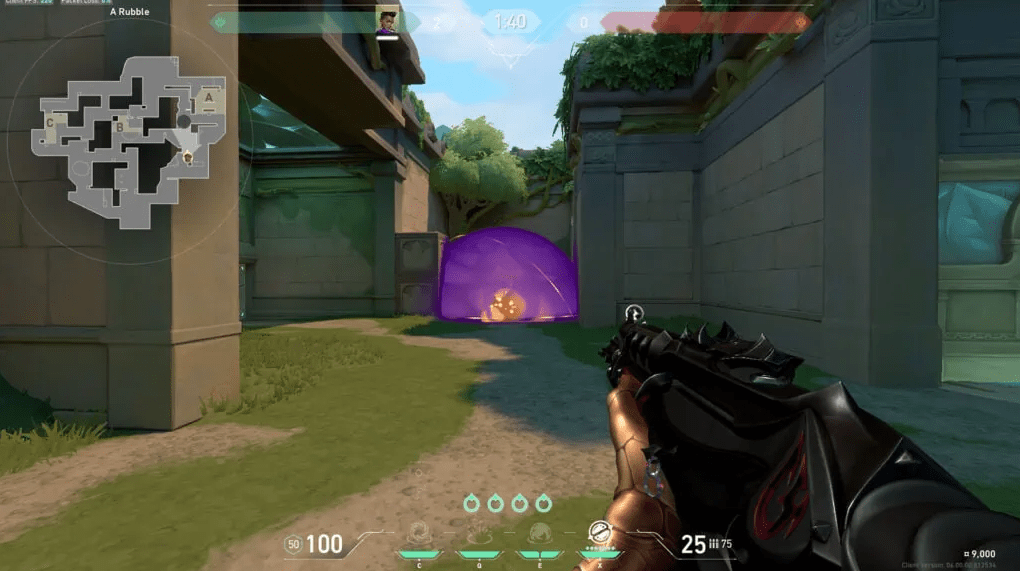
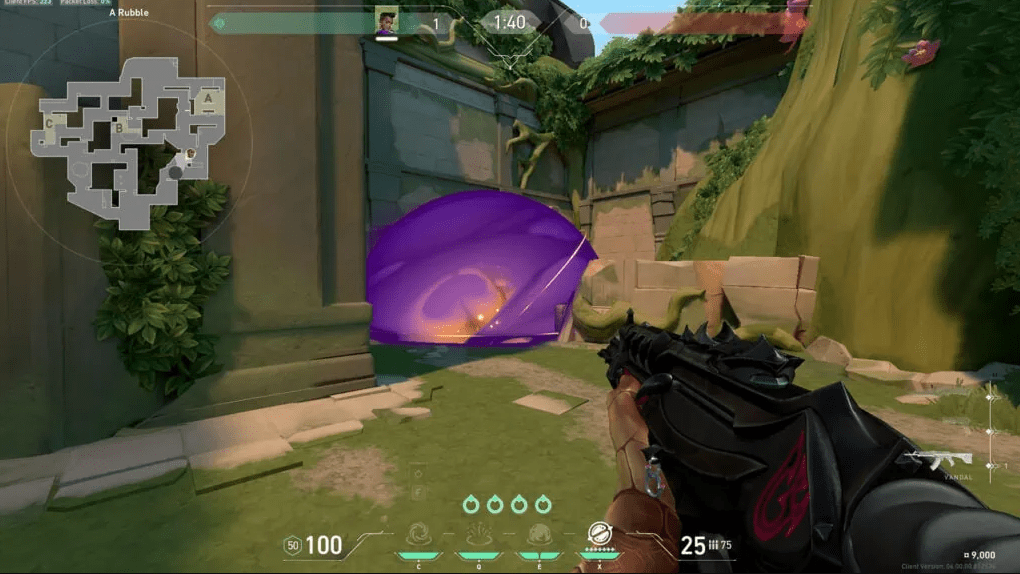
Defenders always have the option to take a proactive stance and aggressively push the attackers right from the start of the round. This can catch the enemy off guard and disrupt their initial plans, giving you a significant advantage. One effective tactic to gain the upper hand is to utilize smoke grenades in the A Root area immediately after the Buy Phase. By obscuring the vision in that area, you force the attackers pushing from A lobby to either take risky peeks out of the smoke or rely heavily on their utility to gain valuable information about the A Main region. Seizing this opportunity, you can even push towards the smoke and potentially catch attackers in vulnerable positions as they jump onto the step of A Root. Such early eliminations can provide a massive boost to your team’s morale and tactical advantage for the rest of the round.
However, there may be instances when you prefer to adopt a more reactive approach and allow the attackers to make the first move. In these cases, it is advisable to employ smoke grenades to block off A Main. By doing so, you create a barrier that compels the enemy team to clear multiple potential hiding spots if they decide to push through the smoke. This forces them to spend valuable time and resources, while your team can strategically position themselves to watch the smoke from both A site and A Stairs. Holding a defensive posture behind the double-stacked box in A Main or patiently waiting inside the smoke can give you the element of surprise and allow you to capitalize on the attackers’ movements. However, it is crucial to remain cautious of initiator abilities such as Sova’s Owl Drone, Skye’s Trailblazer, or Fade’s Prowler, as they can reveal your position or disrupt your plans.
In summary, as a defender, it is important to explore different strategies to gain an advantage over the attackers. Whether it’s by aggressively smoking the A Root area to create chaos or by strategically blocking off A Main to force the attackers to reveal themselves, these tactics can help you control the flow of the round. Remember to adapt your approach based on the situation and be mindful of the potential threats posed by the attackers’ abilities.
B site
When it comes to the B site, battles tend to unfold rapidly and with great intensity due to its compact and enclosed nature. Should both teams decide to contest it, the action becomes fast and furious, demanding quick reflexes and strategic decision-making.
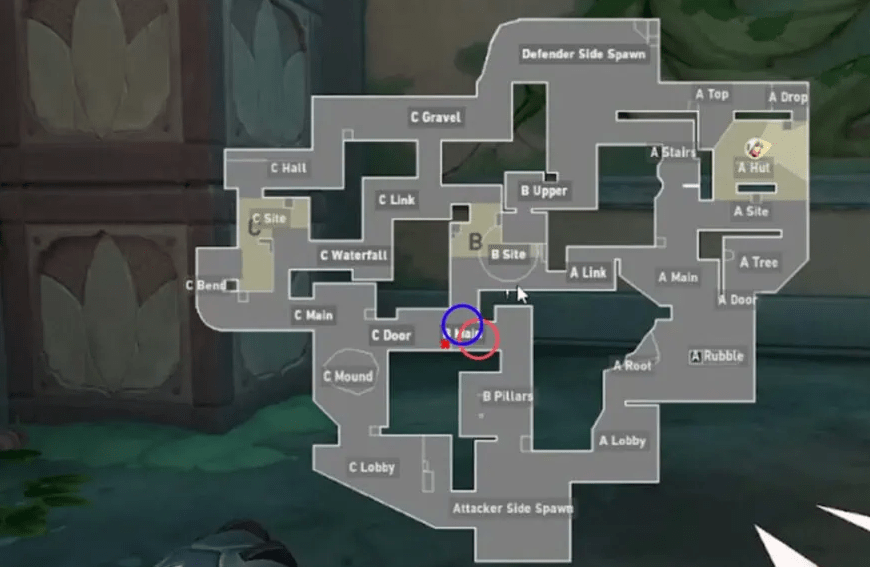
To gain the upper hand in this fierce battleground, it is crucial to master the art of smoke placement. One of the most effective spots to deploy your smoke grenades is at the T-junction in B Main. By obscuring the vision from B Pillars, you create a significant disruption for the attackers, making it difficult for them to accurately assess the situation and coordinate their movements.
However, the success of this smoke placement strategy can be further enhanced if you have teammates positioned to hold C door. In such cases, you can coordinate with them to synchronize your smoke deployment, effectively blocking the vision not only from B Pillars but also from potential attackers coming through C door. This coordinated approach limits the attackers’ options and forces them to contend with reduced visibility, increasing the odds of a successful defense.
On the other hand, there may be instances where you find yourself as the sole defender in the B site. In such scenarios, it becomes crucial to adapt your smoke placement strategy. Instead of focusing solely on B Pillars, it is recommended to prioritize blocking the vision from both B Main and C Door. By doing so, you create a larger area of obscured vision, making it more challenging for the attackers to pinpoint your exact location and plan their approach. This can buy you valuable time to reposition or gather more information about the attackers’ intentions.
In conclusion, the battles that unfold within the B site demand a combination of skill, strategy, and effective smoke placement. By mastering the art of deploying smoke grenades at key locations such as the T-junction in B Main, coordinating with teammates, and adapting your strategy as the sole defender, you can tilt the odds in your favor and emerge victorious in these intense and exhilarating encounters.
C site
To gain an advantage against attackers coming from C Lobby, it is essential to strategically block off their path right from the start of the round. This tactic not only creates obstacles for the attackers but also forces them to reevaluate their approach and potentially waste valuable time in finding alternative routes.
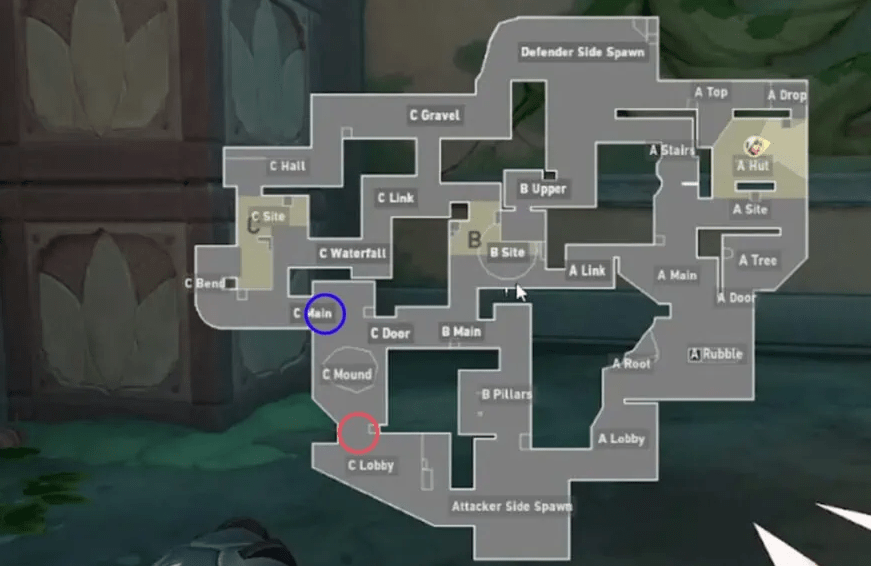
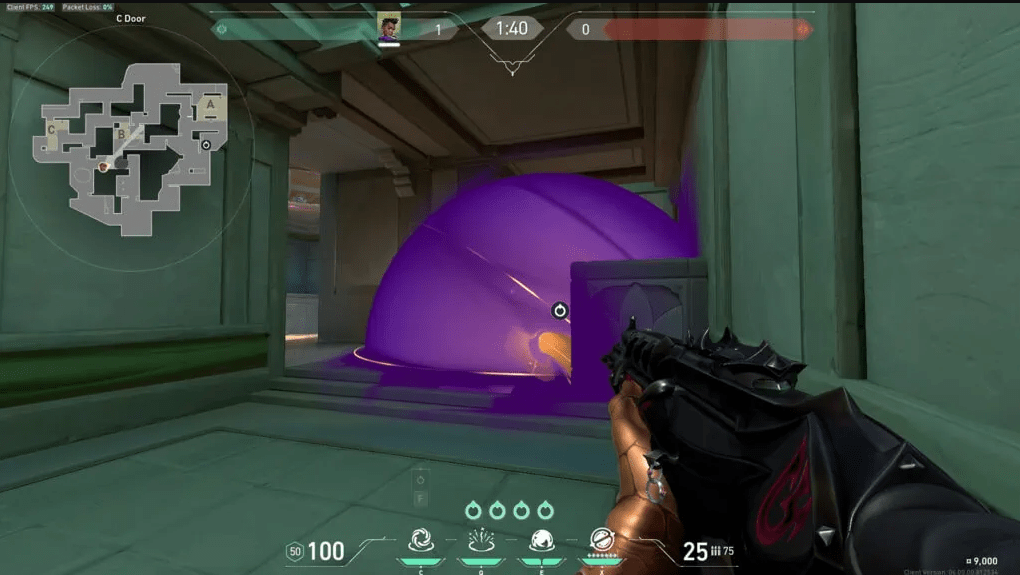
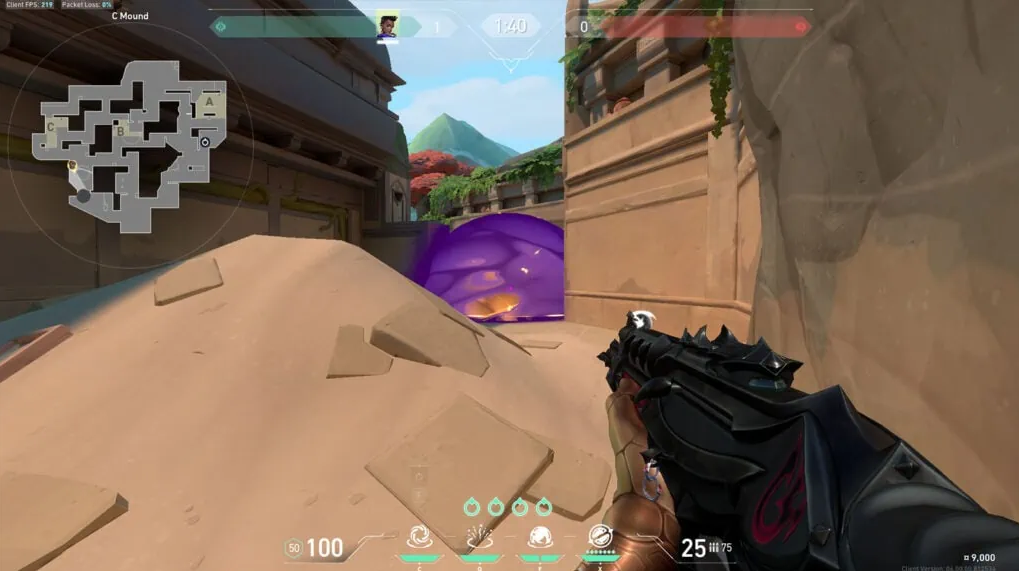
When it comes to defending the C site, smoke grenades become invaluable tools. If you or your teammates find yourselves pushed back and in a defensive position, deploying smoke in C Main can be a game-changer. By obscuring the attackers’ vision, you make it significantly more challenging for them to gather crucial information and execute their strategies effectively.
Furthermore, a well-placed smoke in C Main can buy you and your team precious moments to regroup, reposition, or even launch a counter-attack. It creates an element of surprise and uncertainty for the attackers, forcing them to tread cautiously and potentially giving you the upper hand in engagements.
However, it’s important to note that smoke deployment requires coordination and communication with your teammates. By effectively coordinating your smoke placements and combining them with other defensive measures, such as holding strategic positions and utilizing utility, you can create a formidable defense that is hard for the attackers to penetrate.
Remember, the key to success lies in adaptability and being responsive to the evolving dynamics of the round. Continuously reassess the situation, adjust your tactics accordingly, and maintain effective communication with your teammates to ensure a cohesive defensive strategy.
In summary, by strategically blocking C Lobby and utilizing smoke grenades to obscure vision in C Main, you can disrupt the attackers’ plans and create advantageous situations for your team. With effective teamwork and adaptability, you can defend the C site with confidence and increase your chances of repelling attackers successfully.