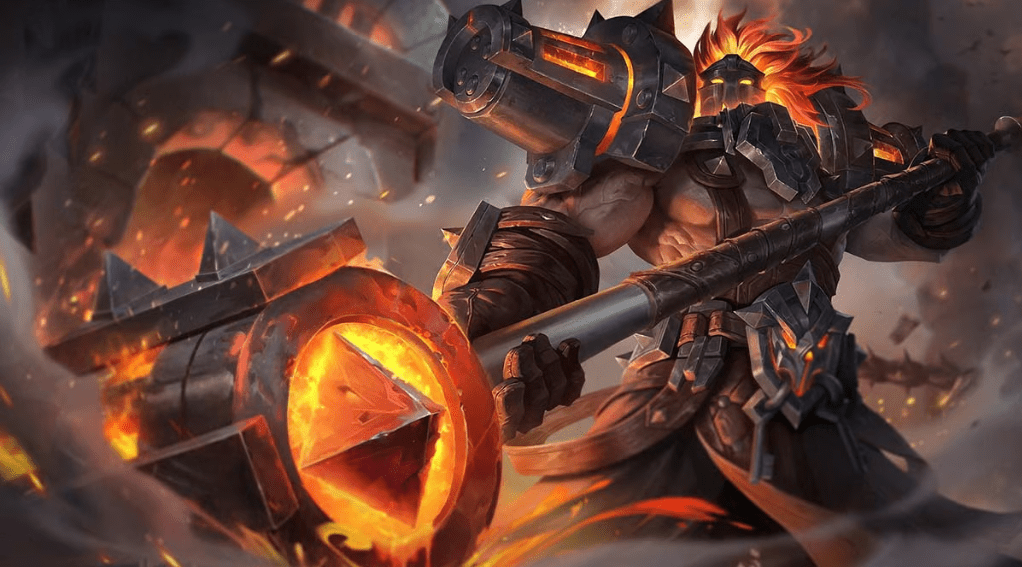
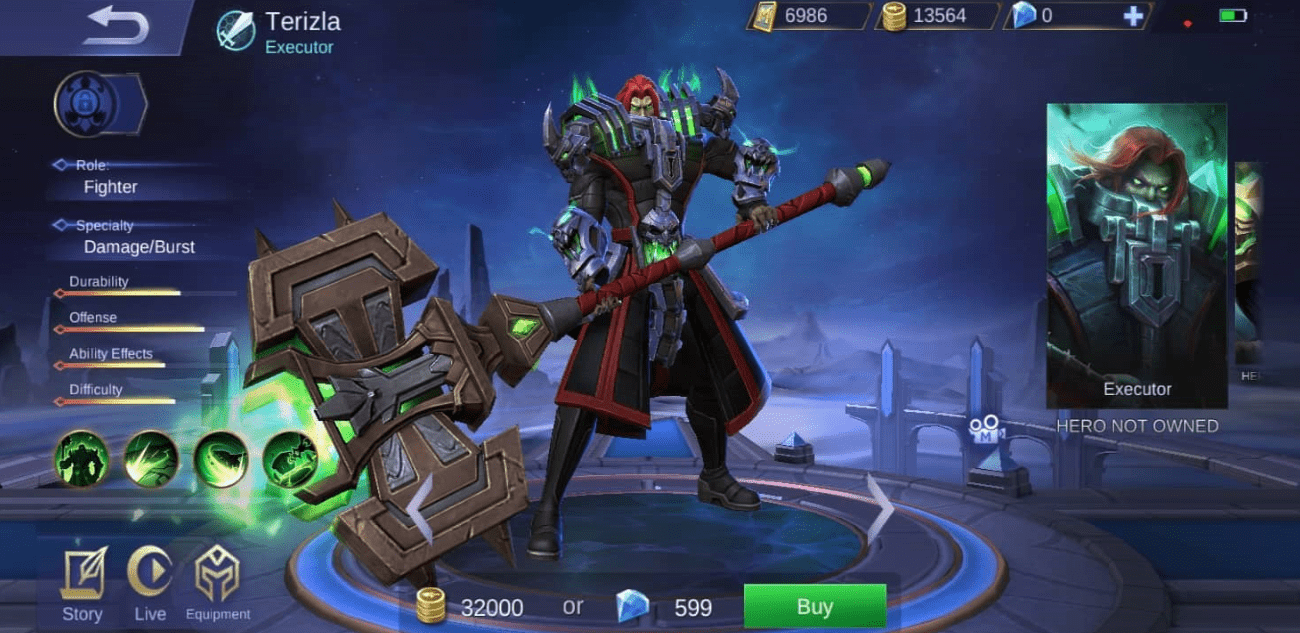
Mobile Legends Terizla guide: Optimal setup for build, skills, emblem, and combos

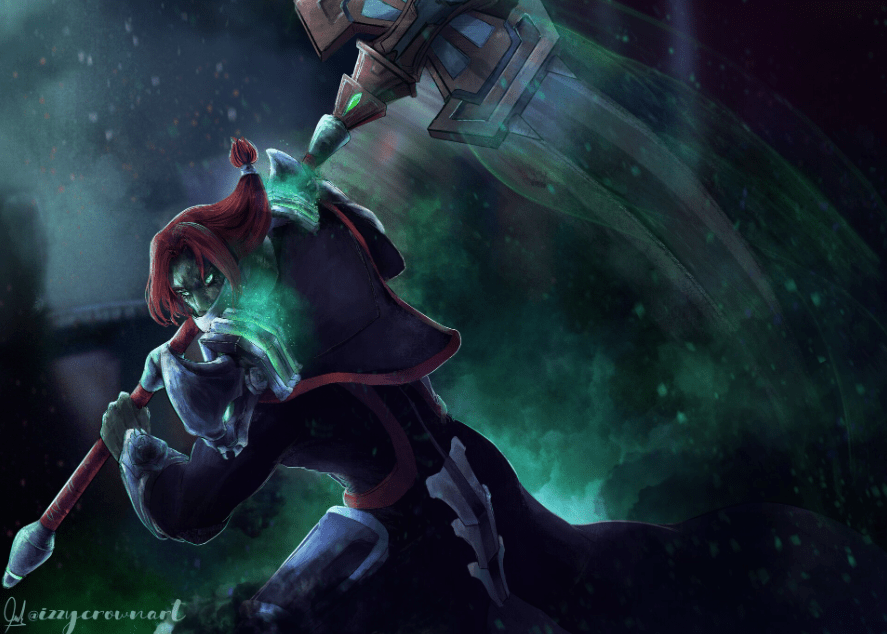
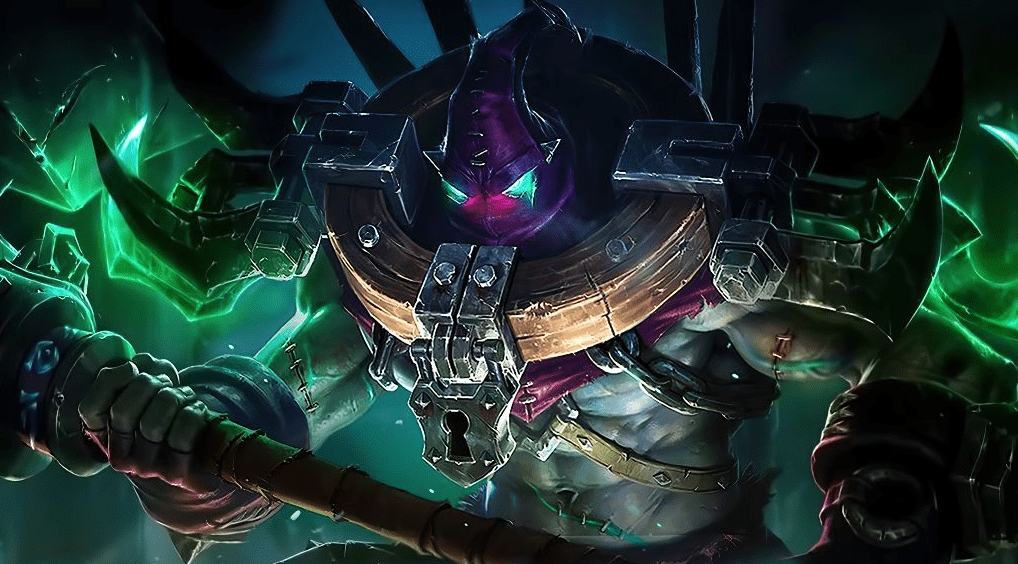
Terizla, the tanky and deadly fighter hero of Mobile Legends: Bang Bang, brings a unique set of skills to the battlefield. His passive ability allows him to gain damage reduction as his health decreases, making him a formidable force on the frontline. In addition to his tankiness, Terizla possesses the ability to deal massive damage to his enemies. His ultimate and other active abilities pack a punch, turning him into a devastating force to be reckoned with. But it doesn’t stop there. Terizla also excels at hindering enemy movement, thanks to his arsenal of crowd control effects.
If you’re looking to master the terrifying Executioner of the Land of Dawn, look no further. This extensive guide from VPEsports will equip you with the knowledge and strategies you need to dominate the battlefield with Terizla. From the best build and optimal skills to emblem selection and combo execution, this guide has got you covered. Ready to unleash the full potential of Terizla? Dive into this guide and become a force to be reckoned with on the mobile legends battlefield.
Table of Contents
Terizla’s skills in Mobile Legends
Passive – Body of Smith
Terizla’s exceptional abilities make him a force to be reckoned with in Mobile Legends. As his health diminishes, Terizla gains a significant boost to damage reduction, allowing him to withstand even the most ferocious assaults from his foes. What sets Terizla apart is his inability to benefit from increased attack speed. However, this limitation is turned into an advantage. Rather than receiving extra attack speed, Terizla converts any potential increase into additional physical attack, amplifying his offensive prowess and making him a formidable threat on the battlefield.
This unique attribute not only adds depth to Terizla’s playstyle but also requires players to strategize and build him accordingly. Balancing damage reduction and physical attack becomes crucial in maximizing his potential and dominating the game. Mastering Terizla’s distinct mechanics and leveraging his strengths is the key to success. Unlock his full potential, adapt your playstyle, and conquer the battlefield with this mighty hero.
- The Body of Smith ability enhances Terizla’s durability, enabling him to endure enemy attacks and shield his allies.
- As Terizla’s HP decreases, he gains damage reduction, making it crucial to prioritize defensive itemization to prevent being quickly eliminated. This approach ensures the passive’s effectiveness is fully optimized.
First skill – Revenge Strike
Terizla, the mighty warrior, channels his immense strength through his hammer, forcefully striking the ground with a thunderous impact. As the earth trembles beneath him, a powerful fissure rips through the terrain, causing devastation in its wake. This seismic force inflicts substantial physical damage to all unfortunate beings caught in its path. Once the fissure collides with its primary target, it exhibits an astonishing ability to drill into the very core of the unfortunate recipient. This drilling action not only inflicts additional physical harm but also hampers the target’s movements, restricting their ability to evade or escape. The sheer force and precision of Terizla’s strikes leave opponents momentarily stunned, struggling to regain their balance.
Furthermore, as Terizla unleashes his earth-shattering assault, he finds himself invigorated by the sheer might of his own abilities. This surge of power grants him an incredible boost in movement speed, enabling him to swiftly maneuver across the battlefield with unparalleled agility. It is a sight to behold as Terizla charges forward, his movements imbued with an almost supernatural grace. But the true display of Terizla’s formidable might comes with the explosive climax of his relentless assault. The fissure, having embedded itself deep within the target, reaches its pinnacle, ready to unleash its devastating payload. In a blinding flash of raw power, the fissure detonates, unleashing a cataclysmic surge of energy. This explosion not only deals base damage but also harnesses the profound force of the enemy’s own vulnerability. As the enemy’s health dwindles, the explosion becomes even more potent, inflicting additional physical damage based on a percentage of the opponent’s lost HP.
- Utilize the slowing effect and movement speed boost of Revenge Strike to either chase down your target or escape from oncoming enemies.
- Prioritize hitting an enemy hero with this skill to ensure they are affected by the explosive damage it delivers.
- When engaging in poke damage, deploy this skill as your initial move to maximize the impact of the delayed explosion, which takes into account the target’s lost HP.
- Since the fissure travels in a straight line, it is advisable to manually aim Revenge Strike for improved accuracy.
Second skill – Execution Strike
Terizla, the mighty warrior, wields his hammer with unparalleled strength, unleashing a devastating fan-shaped attack that reverberates through the air. With each swing, he commands the very essence of power, striking fear into the hearts of his enemies. This awe-inspiring skill can be executed up to three times in quick succession, allowing Terizla to unleash a flurry of precise and calculated blows. The first two strikes of this fearsome technique deliver substantial physical damage, as Terizla’s hammer connects with bone-crushing force. The impact is enough to leave even the hardiest of adversaries reeling in pain. However, it is the third and final strike that truly showcases the true might of Terizla’s prowess. With a resounding crash, his hammer descends upon his target with immense power, dealing a devastating blow that eclipses the previous strikes in sheer ferocity. The force behind this final strike is enough to shatter defenses and leave opponents shattered and defeated.
But the power of Terizla’s fan-shaped attack does not stop there. As each strike connects with an enemy, a profound slowing effect takes hold, impeding their movements and rendering them vulnerable to further assaults. This slowing effect can even stack, intensifying the enemy’s struggle to escape Terizla’s relentless onslaught. With each subsequent strike, the weight of Terizla’s hammer becomes more apparent, pinning down his foes and making their escape all the more elusive. However, it is important to note that the full potential of this skill is not immediately realized against lesser opponents. When facing minions or weaker adversaries, the impact of Terizla’s fan-shaped attack is slightly diminished until the skill reaches its maximum potential. This means that while the blows may still land with force, their overall damage output against these lesser foes may be somewhat reduced. Nonetheless, the sheer force and precision behind each strike are enough to command respect and instill fear in all who dare to stand against Terizla.
- It is recommended to unlock Execution Strike at level one to quickly clear the initial wave of minions and gain an early advantage over your lane opponent.
- Prioritize maxing out Execution Strike, as it serves as Terizla’s primary source of damage and farming capability.
- Take advantage of the ability to cast the second and third strikes in rapid succession. Utilize this mechanic in the early game to poke at your enemy, forcing them out of the lane and depriving them of experience and gold from minions.
- It’s important to consider the mana cost of each strike. If the additional strikes are unnecessary, refrain from casting them to preserve your mana pool.
- While casting Execution Strike, you have a brief window of movement. Utilize this mobility to position yourself strategically during engagements.
- It’s worth noting that Execution Strike can only be interrupted by effects such as being airborne, frozen, suppressed, or transformed.
Ultimate – Penalty Zone
Terizla harnesses his immense strength and agility, propelling himself towards the designated area with astonishing speed and precision. As he lands, the impact resonates with a surge of overwhelming force, unleashing a devastating display of physical might that leaves his enemies reeling. The sheer power behind Terizla’s leap inflicts massive amounts of physical damage, causing even the hardiest opponents to stagger and falter. But Terizla’s onslaught does not end there. With a swift motion, he summons a Scaffold, a formidable construct that emerges from the ground, obstructing the path of his adversaries. The Scaffold’s presence alone instills a sense of unease, as its imposing structure hampers the movement of Terizla’s foes, slowing them down and limiting their ability to maneuver. This strategic advantage allows Terizla to control the battlefield, dictating the flow of combat and keeping his opponents at bay.
As the Scaffold takes its position, it becomes an extension of Terizla’s formidable arsenal. With a swift motion, it launches a hook towards enemy heroes within its range, ensnaring them with unrelenting force. The hook’s grip is unyielding, as it forcefully pulls the enemy hero towards Terizla, subjecting them to a relentless barrage of physical damage. Each pull inflicts further harm, compounding the already substantial punishment dealt by Terizla’s initial leap. The combination of the Scaffold’s hook and Terizla’s raw strength creates a devastating synergy, overwhelming his foes and leaving them vulnerable to his relentless assault.
- The casting animation of Penalty Zone is relatively slow. To add an element of unpredictability, consider hiding in a bush before activating it.
- Utilize Flicker to enhance the range of your ultimate ability, catching your target off guard and delivering a surprise attack.
- Penalty Zone can be utilized as an effective escape tool by allowing you to leap over walls. Take advantage of this feature to quickly evade pursuing enemies and create distance between yourself and potential threats.
A comprehensive guide on how to play Terizla in Mobile Legends: Bang Bang
Recommended battle spell
Terizla, being a hero without inherent mobility skills, relies heavily on the versatility of the Flicker battle spell to navigate the battlefield with finesse. This spell proves to be indispensable in both offensive and defensive scenarios, allowing Terizla to dictate the flow of engagements and escape from perilous situations. When faced with the task of engaging enemies, Flicker serves as Terizla’s key tool for closing the gap swiftly and catching opponents off guard. With a well-timed activation, Terizla can bridge the distance between himself and his targets, enabling him to unleash his devastating abilities at close range. This sudden burst of mobility can catch enemies by surprise, leaving them with limited time to react and counter Terizla’s assault.

Additionally, Flicker offers Terizla a reliable means of escape when confronted with sticky situations. Whether outnumbered or caught in a precarious position, Terizla can employ Flicker to instantly reposition himself to a safer location. This allows him to retreat from danger, regroup with his team, or simply buy precious time to recover and plan his next move. The ability to swiftly escape from harm’s way grants Terizla the survivability needed to endure prolonged battles and emerge victorious.
Furthermore, the synergy between Flicker and Terizla’s ultimate ability, Penalty Zone, presents a formidable combination that can catch opponents off guard and turn the tides of battle. By leveraging Flicker’s enhanced mobility, Terizla can surprise enemies by suddenly initiating with Penalty Zone, creating a zone of control that ensnares and damages anyone caught within its grasp. This unexpected and explosive Flicker ultimate combo has the potential to decimate enemy teams and secure crucial advantages during team fights. In the hands of a skilled Terizla player, Flicker becomes an indispensable asset, elevating his mobility and strategic options to new heights. Whether it’s to close the gap, escape danger, or unleash devastating surprise attacks, Flicker empowers Terizla to dominate the battlefield and leave his opponents in awe of his agility and cunning.
Recommended emblem
As Terizla, choosing the Fighter emblem offers a versatile blend of durability and damage that greatly enhances your performance on the battlefield. This emblem provides a range of benefits including substantial spell vamp, adaptive attack, and hybrid defense, creating a well-rounded foundation for your playstyle. Within the Fighter emblem’s first tier, opting for Rupture grants you additional adaptive penetration, further bolstering the potency of your attacks against enemy heroes. This penetration allows you to break through their defenses, dealing increased damage and asserting your dominance in engagements. Additionally, in the second tier, the Festival of Blood talent can be selected to amplify your spell vamp, enabling you to recover health more efficiently when dealing damage with your abilities. This sustenance is invaluable, allowing you to stay in the fight longer and maintain pressure on your opponents.
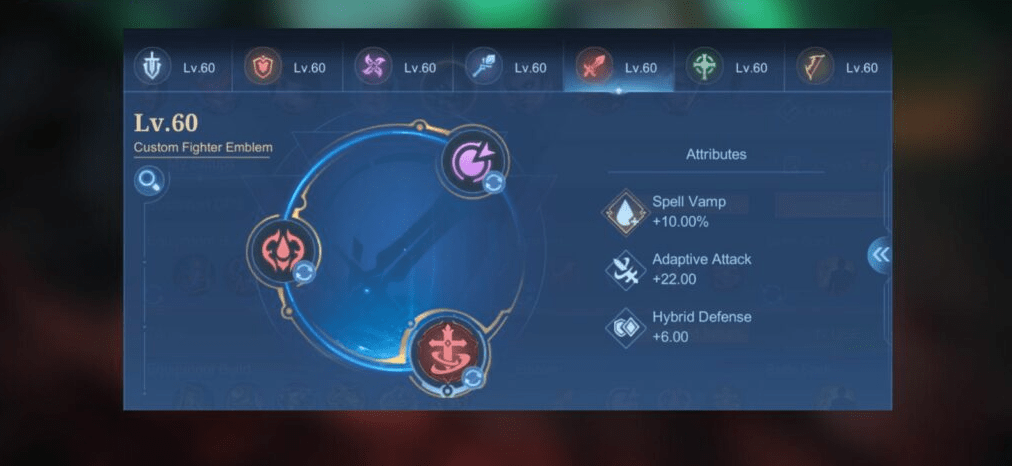
Alternatively, if you seek to enhance your survivability, you have the flexibility to replace Rupture with Vitality from the second tier. This choice grants you extra maximum HP, fortifying your resilience and providing a larger health pool to withstand incoming damage. This additional durability can make a significant difference in prolonged battles, granting you the staying power needed to outlast your opponents. Another viable option is Firmness, which offers additional physical and magic defense. By selecting Firmness, you can bolster your overall resilience, making you more resistant to various types of damage and harder to take down. Completing your emblem set with the Brave Smite talent is highly recommended. This core talent periodically restores a percentage of your maximum health whenever you deal skill damage. This remarkable ability not only increases your sustainability during team fights but also synergizes perfectly with Terizla’s skill-focused playstyle. By dealing skill damage, you continuously replenish a portion of your health, allowing you to endure extended engagements and emerge victorious in battles of attrition.
By carefully customizing your Fighter emblem and selecting the most suitable talents, you maximize Terizla’s potential as a formidable force on the battlefield. The combination of durability and damage provided by the emblem empowers you to sustain through fights, deal significant damage, and emerge triumphant in your endeavors.
Terizla best build
Since you will primarily serve as a frontliner, enhancing your durability is of utmost importance to effectively fulfill your role on the battlefield. To achieve this, there are several key items you should consider adding to your build. Starting with the appropriate type of boots based on your lane opponent is crucial. By assessing their strengths and weaknesses, you can choose the boots that provide the most advantageous bonuses for the specific matchup. This early investment will give you an edge and help you establish dominance in the lane.
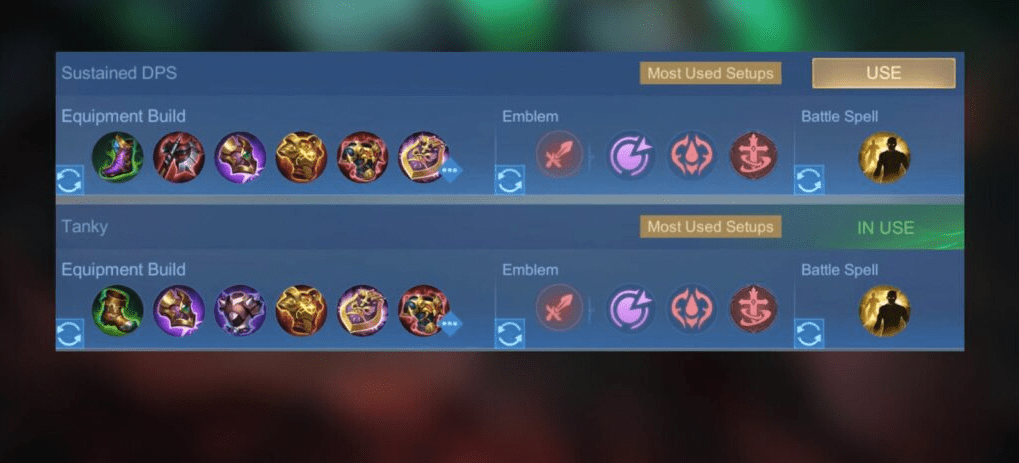
One essential item to consider is the Bloodlust Axe. This item not only grants you spell vamp, allowing you to recover health when dealing damage with your abilities, but also provides a significant boost to your physical attack and cooldown reduction. These attributes not only increase your survivability but also enhance your offensive potential, making it a versatile and valuable addition to your arsenal. However, if your lane opponent has notable HP regeneration capabilities, it may be wise to prioritize the purchase of Dominance Ice. This item reduces the HP regeneration of nearby enemies, countering their sustain and tipping the scales in your favor.
Additionally, it is crucial to adapt your item build based on the composition of the enemy team. If the opposing team consists primarily of physical damage dealers, investing in items like Antique Cuirass or Blade Armor can significantly increase your physical defense. These items provide valuable armor and passive effects that reduce the damage dealt by enemy physical attacks, bolstering your resilience against their assaults. On the other hand, if the enemy team relies heavily on magic damage, items like Athena’s Shield or Radiant Armor are recommended for their magic resistance properties. Equipping these items will help mitigate the damage from magic-based abilities, ensuring you can withstand the onslaught of enemy mages and spellcasters.
In the late game, one item that should not be overlooked is Immortality. This item grants you a second chance at life, resurrecting you with a portion of your health and providing a temporary shield upon death. This can be a game-changing asset, allowing you to turn the tide of battles and provide a crucial advantage in critical moments.
The best build for Terizla in Mobile Legends
- Tough/Warrior Boots
- Bloodlust Axe
- Dominance Ice
- Antique Cuirass
- Athena’s Shield
- Immortality
Easy combos to learn
During the laning phase, you can establish dominance over your opponent by employing a strategic combination of abilities. By initiating with Revenge Strike, swiftly followed by Execution Strike, you will unleash a devastating blow that inflicts substantial damage through the explosive impact of Revenge Strike. This sequence allows you to seize the advantage and put your opponent on the defensive. However, if your adversary possesses exceptional mobility, it may be prudent to first employ the initial cast of Execution Strike to impede their movement before delivering the punishing blow of Revenge Strike. To maintain relentless pressure, follow up with the last two casts of your second skill, further demoralizing your opponent and asserting your presence in the lane. Once you unlock your ultimate ability, Penalty Zone, a realm of new possibilities opens up to you. With this powerful tool at your disposal, you can execute various formidable combos. Commence your assault by initiating with Revenge Strike, capitalizing on its explosive potential. Then, unleash the full force of Penalty Zone, enveloping your target in a zone of punishment, and swiftly follow up with Execution Strike to amplify the devastation wrought upon your hapless foe. This lethal combination maximizes the explosive damage of Revenge Strike, leaving a lasting impact and reinforcing your position as a force to be reckoned with.
Should the need arise to immobilize your target with immediate effect, activate Penalty Zone before executing Revenge Strike and Execution Strike. This swift and decisive action will swiftly incapacitate your opponent, leaving them vulnerable to further onslaught. Alternatively, for a truly unexpected maneuver that catches your enemies off guard, you can execute the Flicker-Penalty Zone combo. By utilizing the Flicker ability in conjunction with Penalty Zone, you can extend the cast range of your ultimate, confounding your adversaries with your sudden and unexpected presence, and seizing the advantage in the most critical of situations. By skillfully utilizing these combinations and adapting your strategies to the unique circumstances of each engagement, you will establish your dominance in the laning phase, unleash devastating blows upon your opponents, and leave an indelible mark on the battlefield. Your ability to execute these maneuvers with precision and finesse will set you apart as a formidable force, commanding respect from allies and striking fear into the hearts of your foes.