What are the Special Zombies in Modern Warfare 3 and how can they be eradicated?
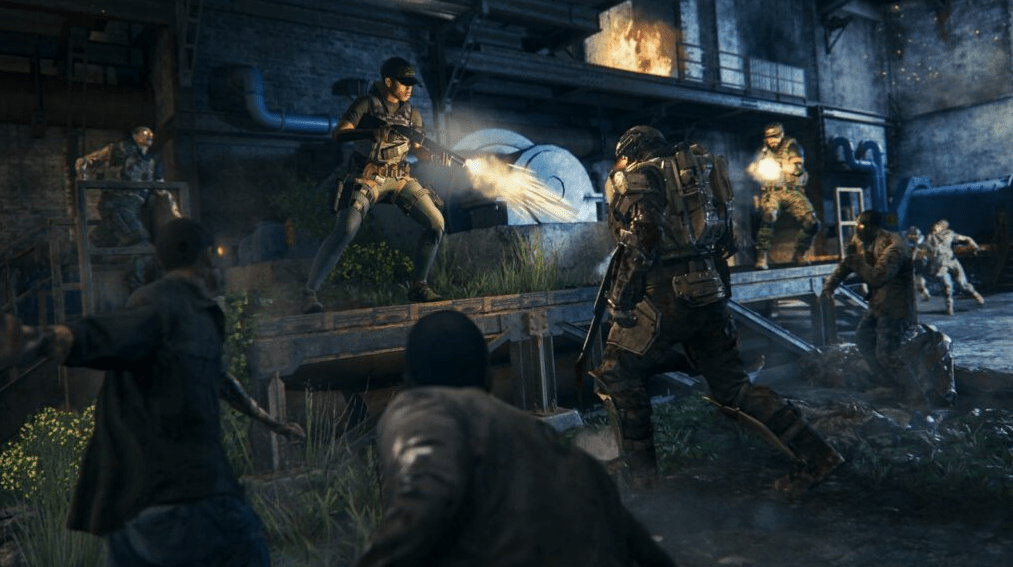
In Modern Warfare 3, players encounter Special Zombies, which present unique challenges and require specific strategies for elimination. These Special Zombies are formidable adversaries that possess enhanced abilities and often require a different approach compared to regular zombies. One notable example is the Serpentinite weapon camo challenge, where players must eliminate 10 Special or Elite Zombies to unlock it. This task adds an extra layer of difficulty and excitement to the gameplay, as players must carefully navigate the battlefield and adapt their tactics to successfully take down these formidable foes.
Special Zombies in Modern Warfare 3 come in various forms, each with its own distinct traits and abilities. Some may have increased speed, enhanced durability, or even special attacks that can catch players off guard. It’s crucial for players to understand the strengths and weaknesses of each type of Special Zombie to devise effective strategies for their elimination. Fortunately, resources like the VPEsports guide provide invaluable assistance in tackling these challenges. Whether it’s through detailed explanations of Special Zombies or sharing the best techniques and loadouts, the guide equips players with the knowledge and strategies needed to overcome these formidable adversaries.
Table of Contents
What are Special Zombies in MW3 and how to effectively take them down
The game currently features three distinct types of Special Zombies:
- Mangler
- Mimic
- Disciple
Mangler
The Mangler is a formidable adversary in the game, possessing the characteristics of a heavily fortified tank. With its versatile arsenal, it is a force to be reckoned with in both close-quarters and long-range combat situations. This Special Zombie not only boasts exceptional durability due to its robust armor but also excels in melee confrontations with its razor-sharp blades. Additionally, its ability to launch homing energy projectiles adds another layer of danger to its offensive capabilities. However, the Mangler’s impressive defensive and offensive power comes at the expense of mobility. It moves at a slower pace compared to other enemies, making it a prime target for skilled players who can exploit its vulnerabilities. Continuous fire can gradually dismantle its armor plating, exposing its weak points and reducing its resilience.
To effectively deal with the Mangler, players are advised to maintain a high level of agility and mobility, evading its powerful melee attacks while simultaneously minimizing the damage inflicted by its energy blasts. Strategic positioning and effective use of cover are crucial in avoiding direct confrontations and maximizing survivability. When engaging the Mangler, it is important to prioritize accuracy and precision. Focusing fire on specific areas, such as the head or other exposed weak points, will expedite its defeat. By systematically chipping away at its armor and capitalizing on its vulnerable moments, players can efficiently neutralize this formidable threat.
Coordinated teamwork can also play a vital role in overcoming the Mangler’s challenges. Combining forces and utilizing complementary abilities and loadouts can greatly enhance the chances of success against this formidable enemy. Communication and coordination are key in devising effective strategies to exploit its weaknesses and bring it down. Remember, the Mangler is not to be taken lightly. Its impressive offensive and defensive capabilities make it a significant obstacle to overcome. However, with the right tactics, adaptability, and teamwork, players can emerge victorious and continue their pursuit of success in the game.
Mimic
The Mimic is a cunning and deceptive enemy that lives up to its name. It excels in the art of camouflage and surprise attacks, often disguising itself as ordinary objects within the environment. When unsuspecting players venture too close, it reveals its true form and launches lethal assaults. Like the Mangler, the Mimic possesses a versatile set of skills, enabling it to engage in both close-quarters and long-range combat. Its long-range attack is specifically designed to lure players into its trap, inflicting devastating damage upon them. Furthermore, the Mimic’s remarkable speed makes it a formidable adversary that is difficult to outrun. Effectively countering the Mimic requires a keen understanding of its deceptive tactics and strategic use of the environment. Utilizing barriers and corners to create distance between yourself and the Mimic can help minimize the impact of its ranged attacks and impede its swift approach. Consistent and sustained firepower is crucial in gradually wearing down its health and resilience. While the Mimic’s mouth is a vulnerable spot, targeting any part of its body can be effective in neutralizing the threat without exposing oneself to unnecessary risks.

Surviving encounters with the Mimic requires heightened situational awareness and adaptability. Players must remain vigilant and cautious, scrutinizing their surroundings for any signs of unusual objects or movements. Engaging in effective teamwork and communication can also greatly enhance the chances of success when dealing with this deceptive foe. Coordinating attacks, sharing information, and strategizing together can help overcome the Mimic’s surprise element and turn the tide of the battle in your favor. Conquering the Mimic is a test of skill, observation, and quick reflexes. By studying its patterns, exploiting its weaknesses, and utilizing smart tactics, players can emerge victorious against this cunning adversary. Remember, appearances can be deceiving, and the Mimic is a master of deception. Stay alert, stay focused, and stay one step ahead to triumph over this formidable opponent.
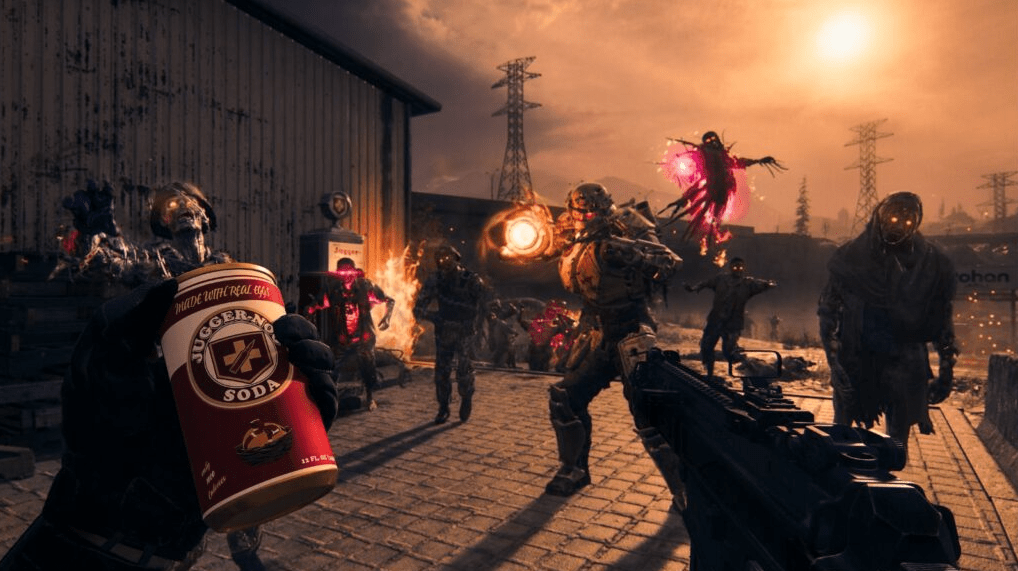
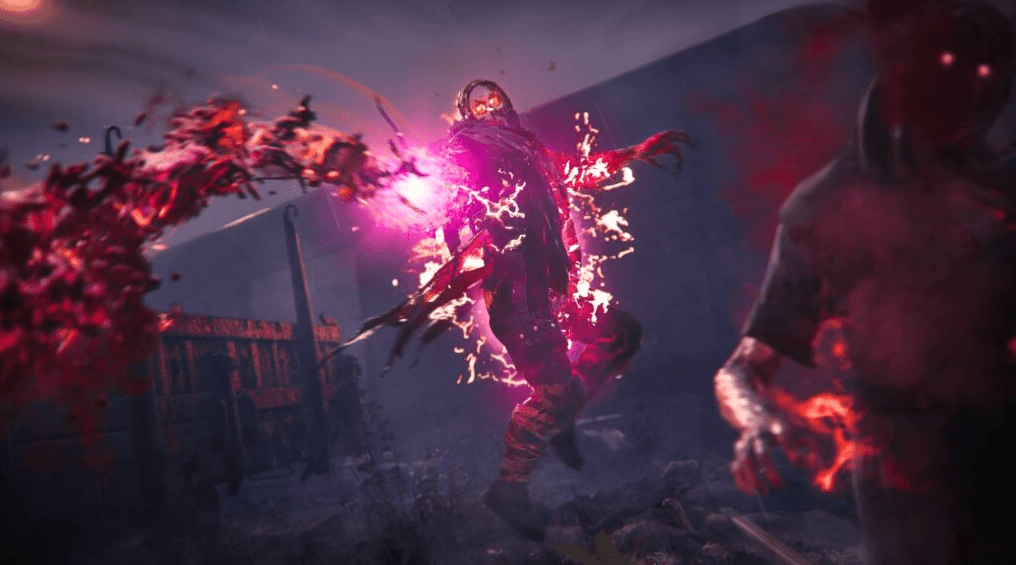
Disciple
The Disciple, known as a necromancer in the world of MW3, is a specialist in long-range engagements, wielding a sinister power to drain life from its victims using a tether that inflicts continuous damage. This unique ability adds a chilling layer of complexity to battles, as players must contend with not only the Disciple’s lethal attacks but also the constant threat of depleting health. To further complicate matters, the Disciple has the ability to summon additional Zombies into the fray. This strategic maneuver overwhelms players with sheer numbers, pushing their ammunition to the limit and testing their ability to withstand persistent damage. The combination of the Disciple’s life-draining tether and the relentless onslaught of summoned Zombies makes it a formidable opponent that demands careful planning and execution.
When facing the Disciple, employing a well-rounded strategy is essential. Utilizing explosive devices such as grenades and C4 can effectively neutralize clusters of Zombies, providing much-needed breathing room. However, players must remain vigilant and maintain distance to avoid falling victim to the Disciple’s life-draining tether. The choice of weapons becomes critical, with long-range options like sniper rifles, marksman rifles, and battle rifles offering a distinct advantage against the Disciple’s long-range capabilities. Success against the Disciple requires not only individual skill but also effective teamwork and coordination. Communicating with teammates to prioritize targets and focus fire on the Disciple is crucial for overcoming its deadly abilities. Players must remain adaptable, constantly reassessing the battlefield and adjusting their tactics to counter the unpredictable nature of the Disciple’s summoned reinforcements.
Surviving encounters with the Disciple necessitates a delicate balance of offense and defense. Striking a balance between eliminating the Disciple and managing the relentless waves of Zombies is key to emerging victorious. It requires a combination of precision, resource management, and strategic thinking to dismantle the Disciple’s power and restore order to the battlefield. Remember, the Disciple is a formidable adversary with its long-range proficiency and ability to summon reinforcements. By employing a calculated approach, leveraging explosive devices, and coordinating with teammates, players can increase their chances of prevailing against this necromantic threat. Stay focused, stay adaptable, and stand united against the Disciple’s dark forces.


