Understanding Scatter Mines: Effective Strategies in Modern Warfare 3 and Warzone
In Call of Duty Modern Warfare 3 and Warzone, Scatter Mines are introduced as a tactical equipment option right from the beginning of the game. These unique devices, while not known for inflicting significant damage, offer unparalleled utility when utilized strategically.
Scatter Mines are designed to disrupt enemy movement and control key areas on the battlefield. Their primary purpose is to create obstacles and deter opponents from advancing or flanking. By scattering miniature explosives across an area, they effectively deny access and force adversaries to rethink their approach. To unlock Scatter Mines in MW3, players need to progress through the game and meet certain criteria, such as reaching specific levels or completing challenges. Once unlocked, players can equip Scatter Mines in their loadout and deploy them during matches.
Deploying Scatter Mines effectively requires careful consideration of the environment and the enemy’s likely approach. Placing them in chokepoints, high-traffic areas, or near objectives can maximize their effectiveness. Additionally, coordinating with teammates and combining Scatter Mines with other tactical equipment or killstreaks can create devastating combinations. VPEsports provides a comprehensive guide on unlocking Scatter Mines in MW3 and offers valuable tips on how to deploy them optimally. Mastering the art of using Scatter Mines can elevate players’ tactical gameplay and contribute to their success in both Modern Warfare 3 and Warzone. Remember, while Scatter Mines may not deal significant damage, their strategic value lies in their ability to disrupt enemy movement and control the flow of the battle. So, equip yourself with these tactical tools and dominate the battlefield with cunning and precision.
Table of Contents
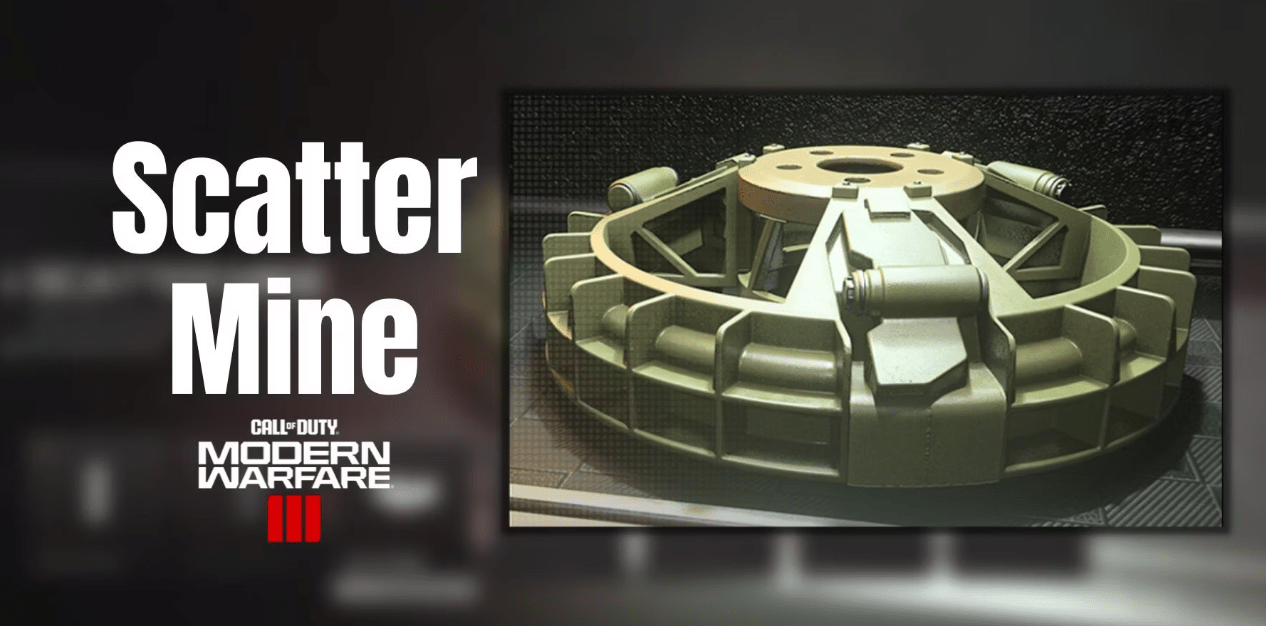
The Complete Guide to Understanding the Scatter Mine
Although Scatter Mines may bear some resemblance to Claymores and Proximity Mines in terms of functionality, their primary purpose sets them apart. Unlike their counterparts, Scatter Mines are not primarily designed for causing direct damage. Instead, they excel in providing strategic utility on the battlefield. The key distinction lies in the way Scatter Mines are deployed and their intended effect on enemy movement. While Claymores and Proximity Mines are typically positioned to deliver a powerful explosive blast upon detection, Scatter Mines are strategically scattered across an area to disrupt and impede enemy advances. By dispersing miniature explosives across a designated zone, Scatter Mines create a formidable deterrent, forcing opponents to reconsider their approach. Rather than focusing on dealing significant damage, these tactical tools are deployed to obstruct enemy movement, control key areas, and force adversaries into vulnerable positions.

Strategic placement is crucial when using Scatter Mines effectively. Identifying chokepoints, high-traffic areas, or locations near critical objectives can maximize their impact. Additionally, coordinating with teammates to combine Scatter Mines with other tactical equipment or coordinating attacks can yield devastating results. To fully grasp the intricacies of Scatter Mines, it is essential to understand their strengths and limitations. While they may not possess the explosive force of Claymores or Proximity Mines, their value lies in their ability to disrupt enemy movements and reshape the battlefield to your advantage. By mastering the art of Scatter Mines, players can enhance their tactical gameplay and gain a significant edge in both Modern Warfare 3 and Warzone. So, embrace the strategic utility of Scatter Mines and unlock their full potential to dominate the battlefield with cunning and precision.
Mastering the Deployment of Scatter Mines: Unlocking Their Potential
Unlocking the Scatter Mine in the game is a relatively straightforward endeavor. Players need to focus on progressing through the ranks and achieving the esteemed rank 18 to gain access to this tactical equipment. As players engage in matches, earning experience points and completing challenges, they will gradually climb the ranks. With each level gained, they inch closer to unlocking the Scatter Mine. It is essential to stay committed and persistent in their gameplay to reach the desired rank. Once players have successfully reached rank 18, a new world of strategic possibilities opens up. They can now equip the Scatter Mine in their tactical equipment slot, adding a powerful tool to their arsenal. This unlocks the potential to shape the battlefield, disrupt enemy movement, and gain a strategic advantage over opponents.

With the Scatter Mine at their disposal, players can devise intricate strategies, setting traps, and controlling key areas. Placing Scatter Mines strategically in high-traffic zones, chokepoints, or near objectives can impede enemy advances and create opportunities for successful engagements. It is important to note that while the Scatter Mine may not deliver devastating damage like some other explosive devices, its true strength lies in its ability to influence the flow of battle. By deterring opponents and forcing them to alter their tactics, players can gain a significant edge in engagements. Understanding the mechanics and nuances of the Scatter Mine is essential for effective deployment. Experimenting with different placements, observing enemy movement patterns, and collaborating with teammates can enhance its utility on the battlefield. By unlocking the Scatter Mine and mastering its usage, players can elevate their gameplay, adapt to various scenarios, and become formidable forces in both Modern Warfare 3 and Warzone. So, embrace the challenge, strive for rank 18, and unleash the strategic potential of the Scatter Mine.
Maximizing the Tactical Advantage: Effective Deployment of Scatter Mines
Scatter Mines are tactical devices designed to serve as an early warning and enemy detection system in combat scenarios. Once deployed, these mines are triggered and explode when enemies approach too closely, providing valuable information to the owner. While Scatter Mines may not possess the firepower to eliminate enemies outright, they do offer a hit marker, which alerts the player to the presence of enemies within the vicinity of the mines. This notification becomes a crucial advantage, allowing players to react swiftly and make informed decisions about their next course of action. One of the most effective uses of Scatter Mines is in situations where players aim to secure and control specific areas of the map. By strategically placing the mines out of sight on flanking routes or near high-traffic areas, players can gain valuable insight into enemy movements and intentions. When deployed along flanks, Scatter Mines act as a defensive measure, serving as an early warning system against potential threats. They provide players with the opportunity to either reposition themselves to a more advantageous position or prepare for an imminent engagement. In the context of locking down an area, Scatter Mines can be instrumental in fortifying a position and deterring enemy advancements. By placing the mines inconspicuously and covering multiple angles of approach, players can create a defensive perimeter that adversaries will hesitate to breach. Narrow alleyways and entry points into buildings are particularly suitable locations for deploying Scatter Mines. These areas naturally funnel enemy movements, increasing the likelihood that they will come within the proximity radius of the mines.

By strategically positioning the mines at these chokepoints, players can maximize their effectiveness and create a significant obstacle for enemy forces. The information provided by the Scatter Mines is not limited to their detonation alone. Observing the hit marker can offer valuable insights into enemy engagement patterns and allow players to anticipate potential threats. By analyzing the frequency and direction of hit markers, players can deduce the presence of multiple enemies or identify potential flanking maneuvers. One effective tactic is to pair Scatter Mines with other defensive measures. Placing them in conjunction with proximity-based explosives like Claymores or setting up a tripwire system can create layered defenses that catch enemies off guard. Such combinations can be particularly effective in objective-based game modes, where controlling key areas is crucial for victory. Communication and coordination with teammates are vital aspects of deploying Scatter Mines effectively. By sharing information about mine placements and coordinating defensive strategies, players can maximize the impact of these tactical devices. Teammates can provide additional support by covering blind spots or providing cover fire while players reposition themselves based on the information provided by the mines. It is important to note that Scatter Mines should not be solely relied upon as a standalone defense mechanism. They are most effective when used in conjunction with other strategies, such as map awareness, effective communication, and skillful gunplay. By integrating Scatter Mines into a broader tactical approach, players can create a well-rounded gameplay style that leverages the advantages offered by these devices.
In summary, Scatter Mines are valuable tools in a player’s arsenal, offering early warning and enemy detection capabilities. While they may not deliver lethal damage, their utility lies in their ability to provide crucial information about enemy presence and movements. By strategically deploying Scatter Mines, players can fortify their positions, lock down key areas, and gain a significant advantage in combat situations.


